Inferno SMART Client
Inferno is a reference SMART on FHIR client used to validate conformance. In this guide, we focus on the Patient Standalone flow.
Step 1: Launch Inferno
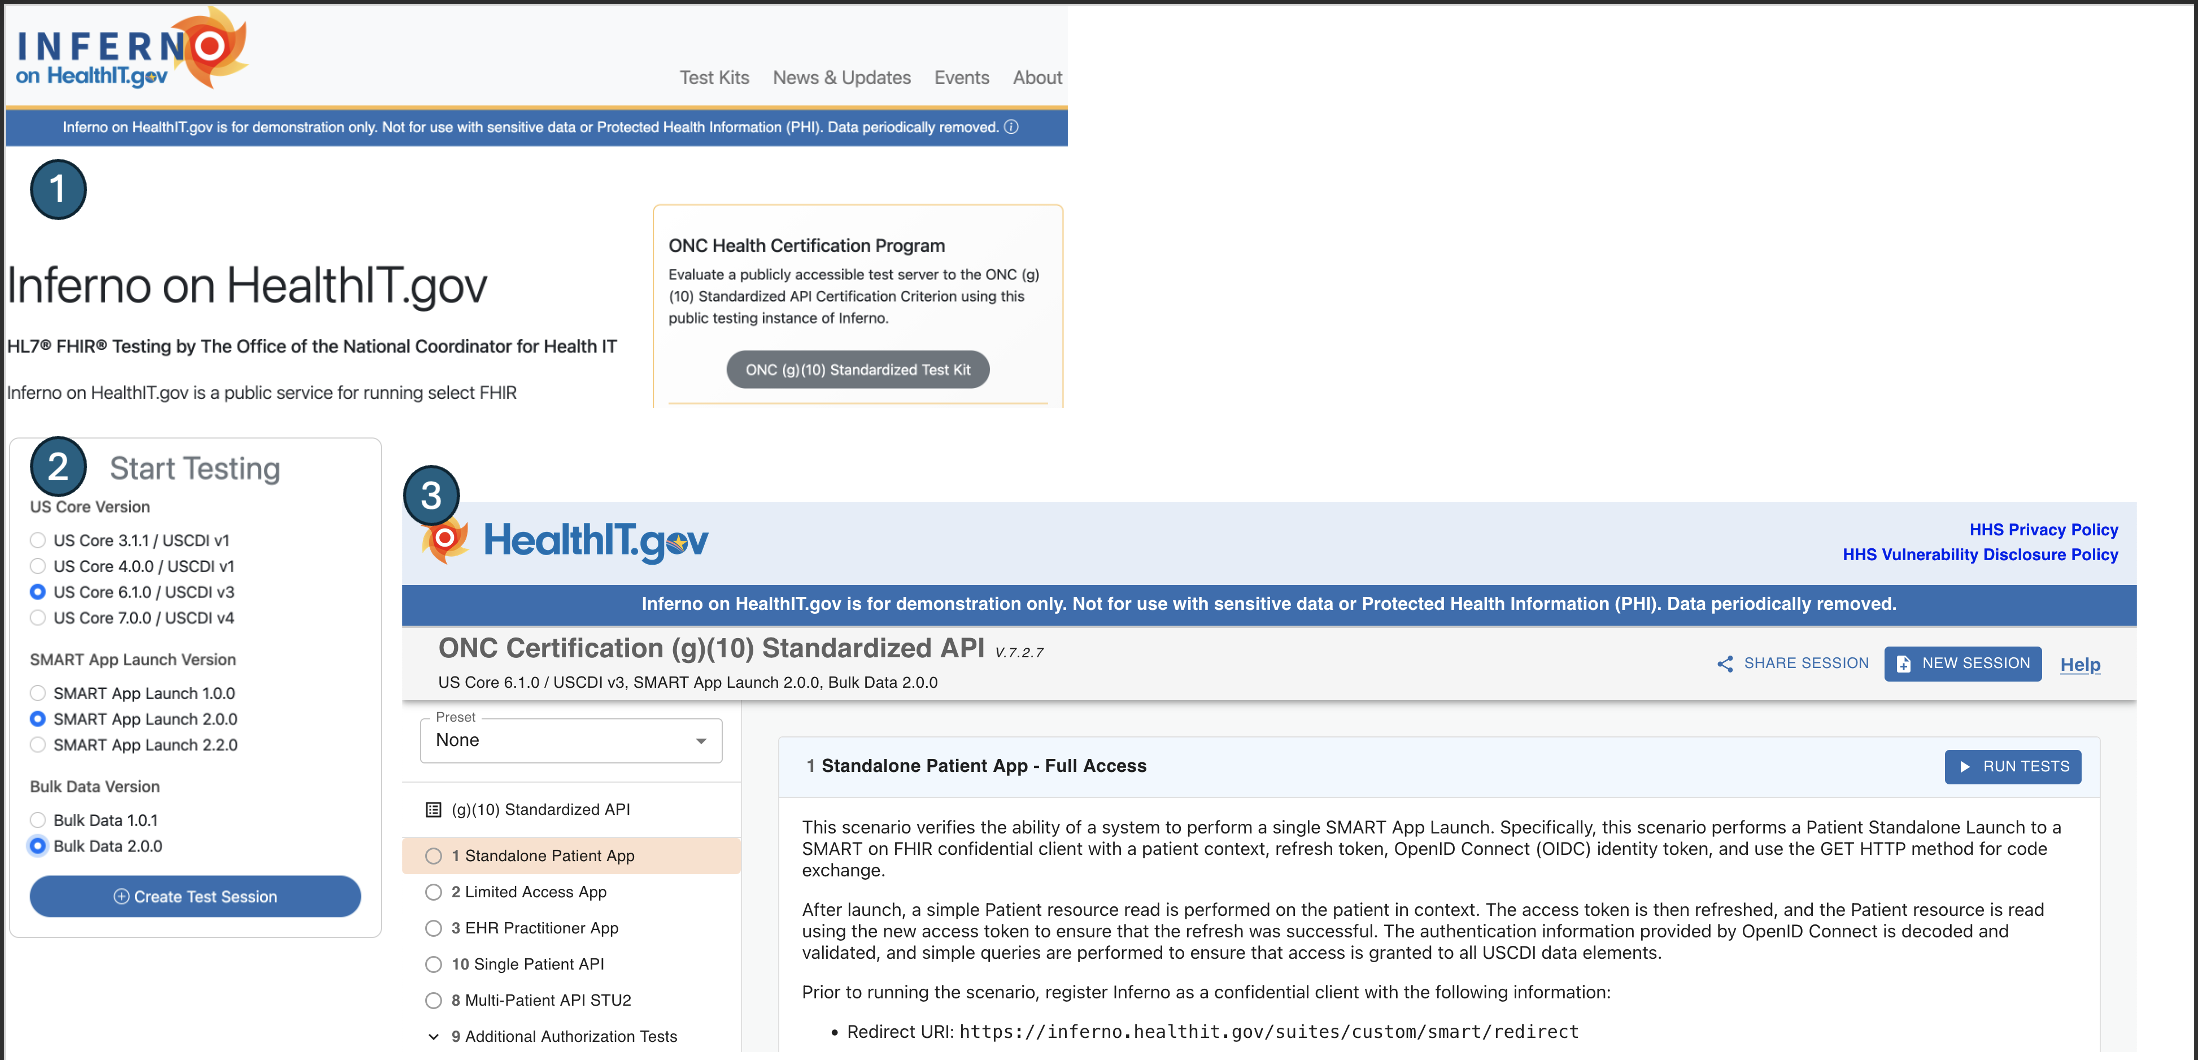
- Choose ONC g10
- Select: US Core 6.1.0 | SMART App Launch 2.0.0 | Bulk Data 2.0.0
- Create a new session
- Choose “Standalone Patient App”
- Click “Run Tests”
Step 2: Configure Patient Standalone
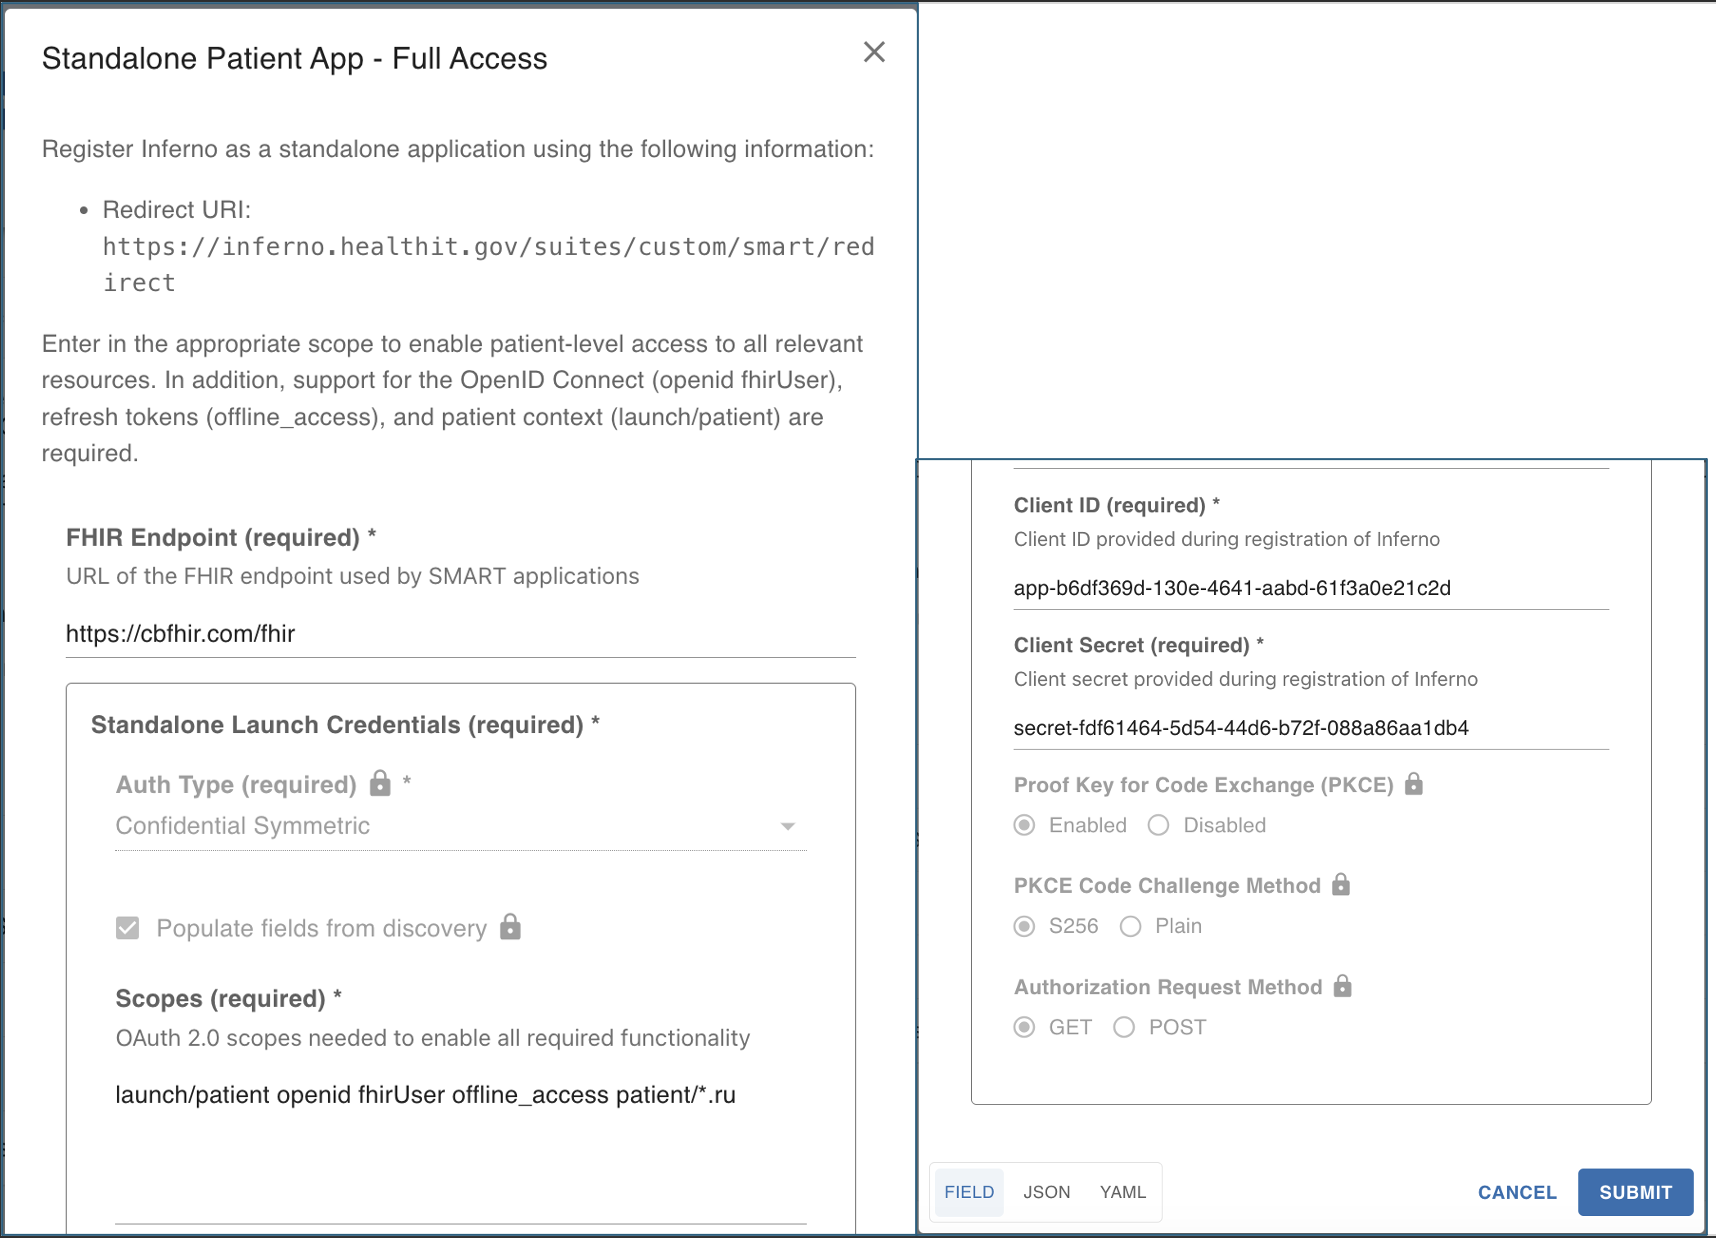
- Redirect URI: use the same one as in Client Registration
- FHIR endpoint: add your public FHIR base (e.g.,
https://your-domain/fhir) - Required scopes (used by Inferno):
launch/patientopenidfhirUseroffline_accesspatient/*.ru- Client ID and Secret: copy from Client Registration
- Leave other settings as defaults
- Submit
Step 3: Redirect to Authorization
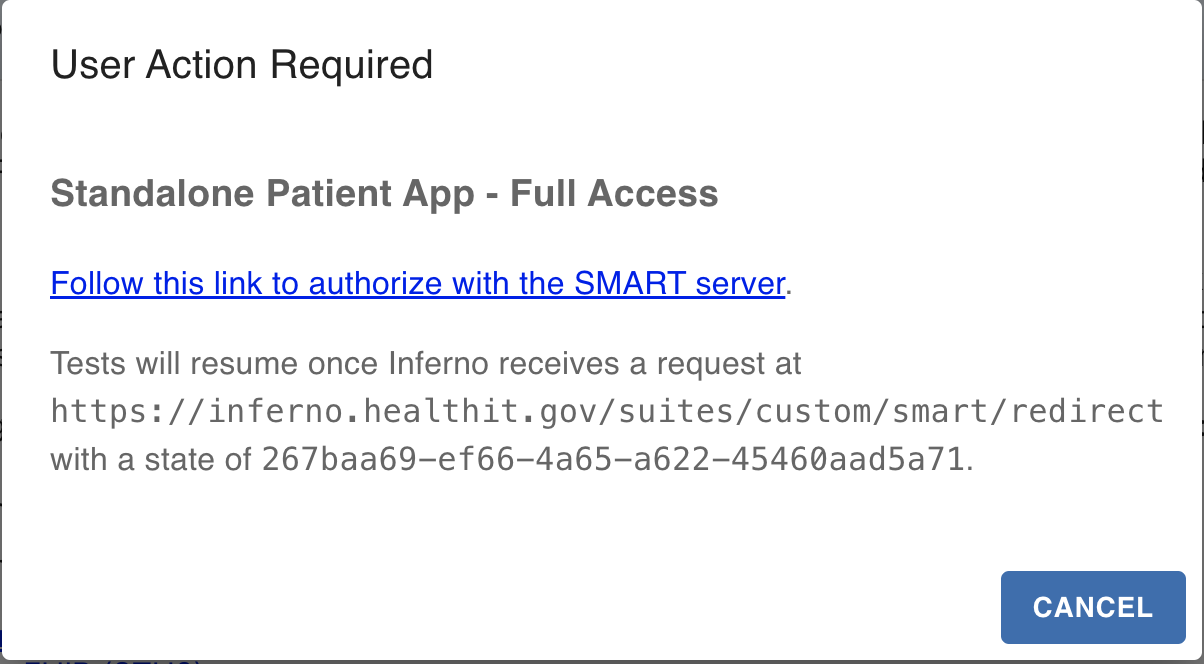
Inferno connects to your FHIR server and displays a redirect link for authorization.
- Click the link to proceed
Step 4: Provider Login
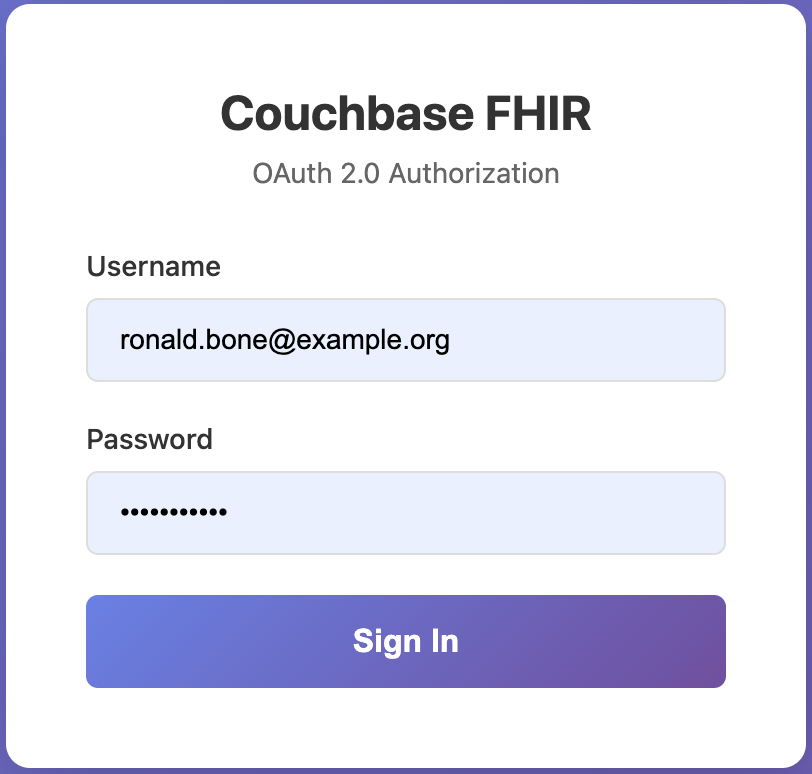
- Practitioner logs in
- For US Core testing, a sample practitioner user exists (testing only)
- Example credentials:
ronald.bone@example.org / password123 - After login, you are taken to the patient picker form
Step 5: Patient Picker
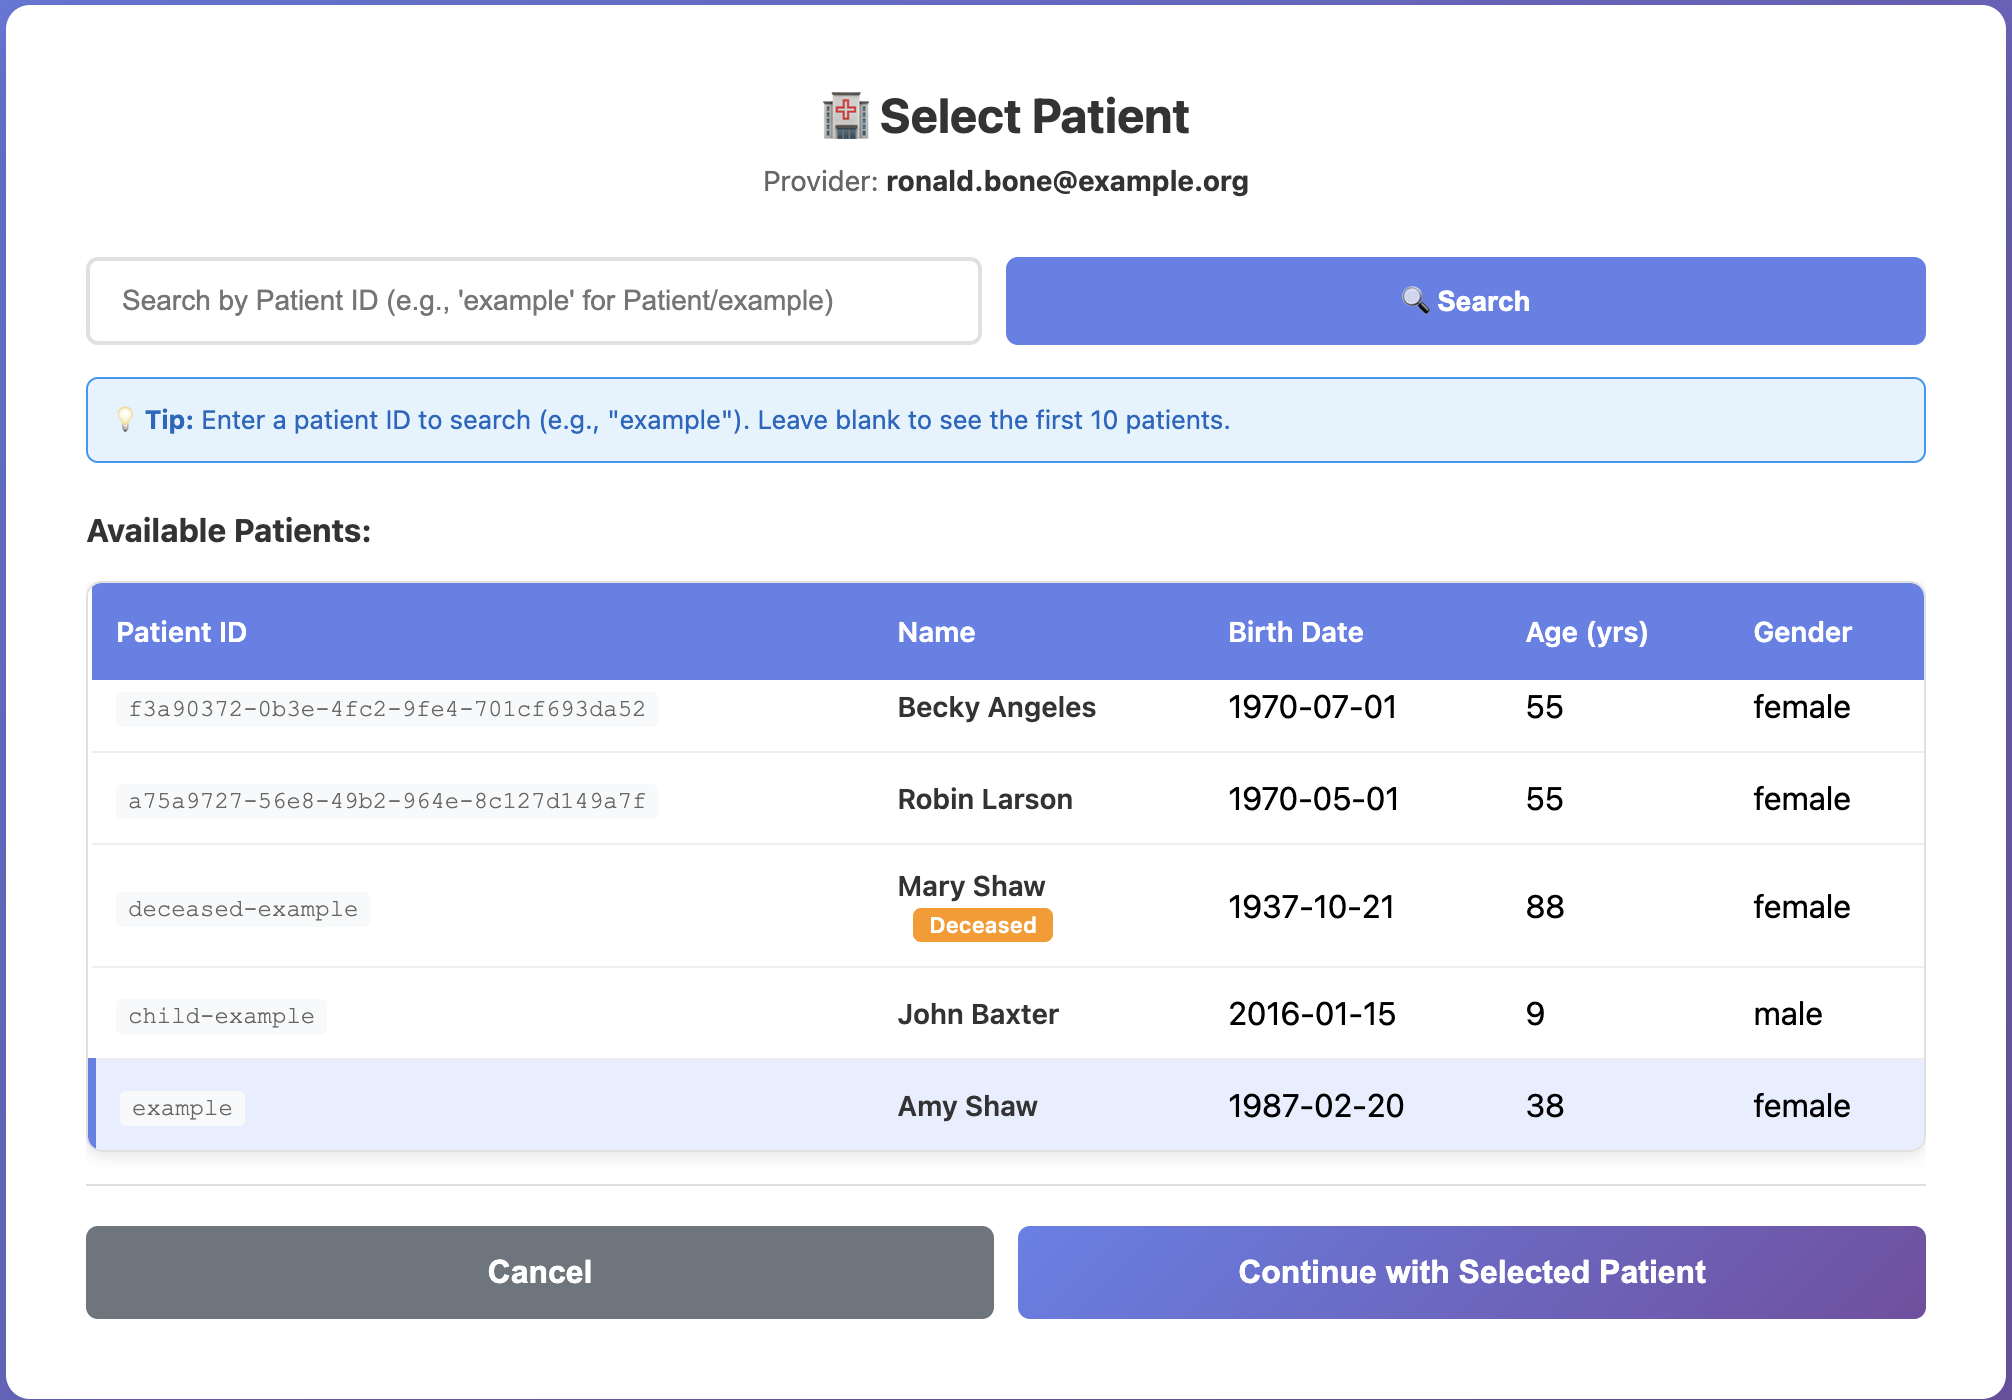
- The form shows 10 sample patients
- You can search for a patient if they are not displayed
- Lets choose Patient
Amy Shaw
Step 6: Consent
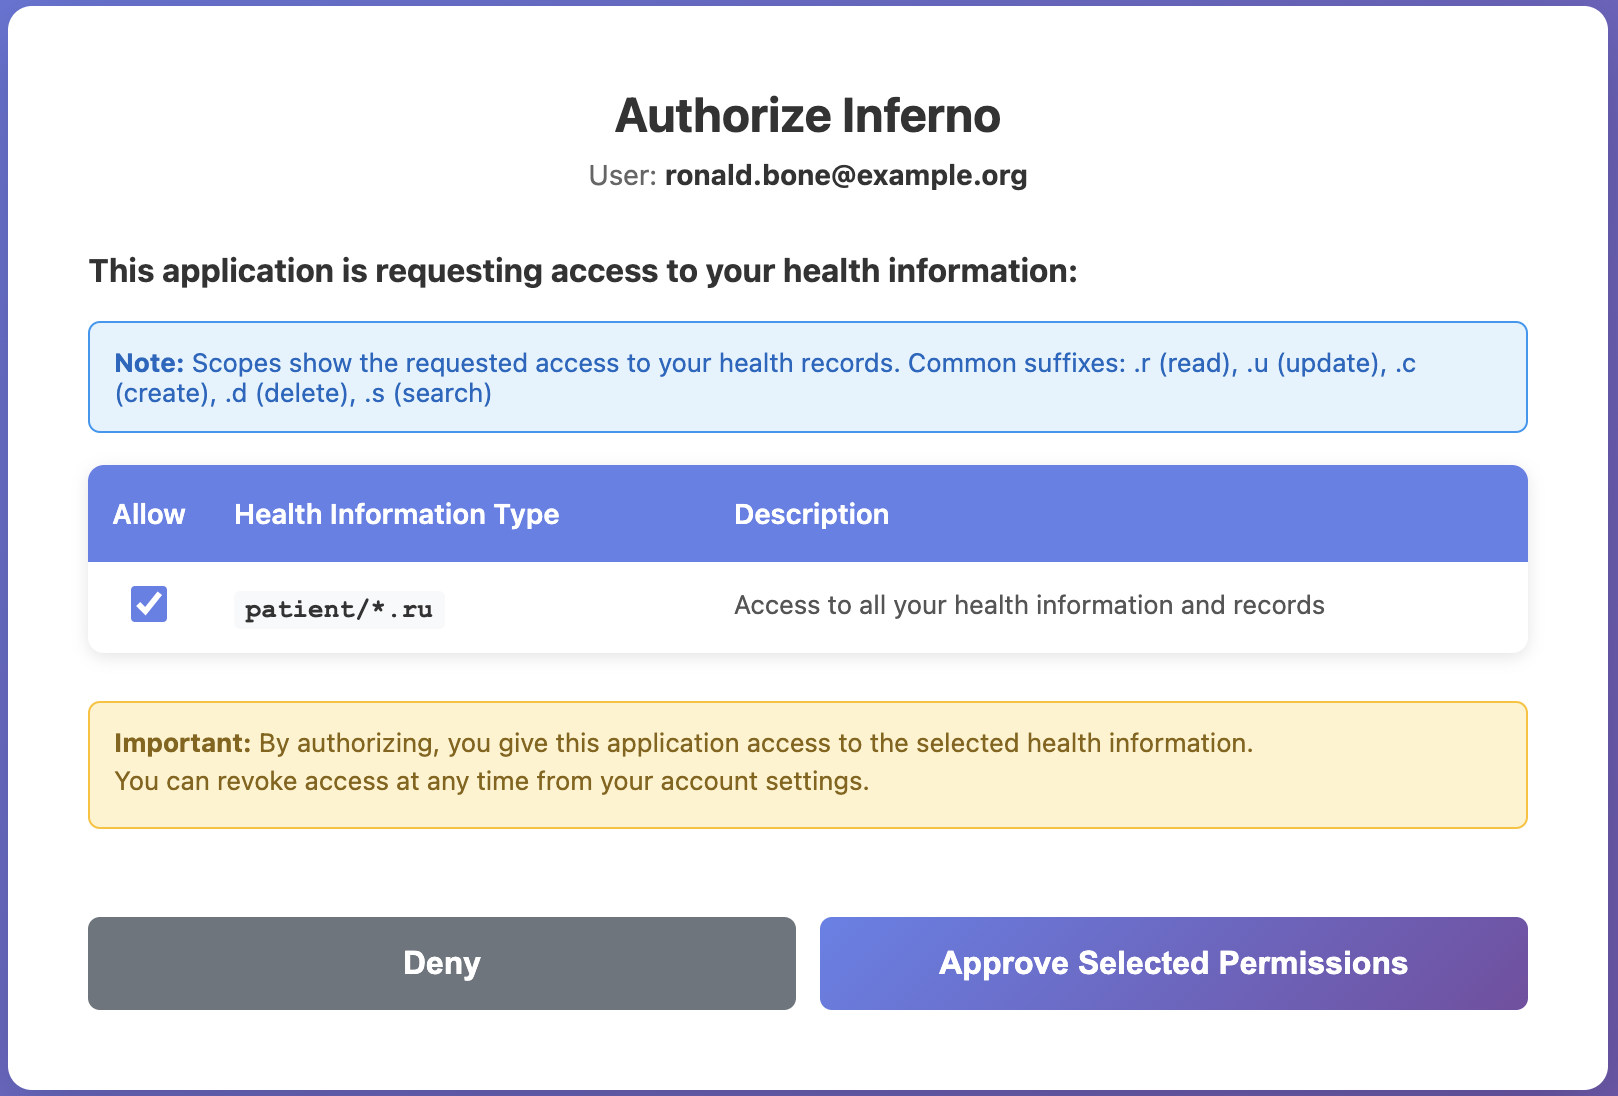
- The consent form lists scopes requested by the client
- Review and accept consent
- Inferno resumes and runs tests
Step 7: Test Results
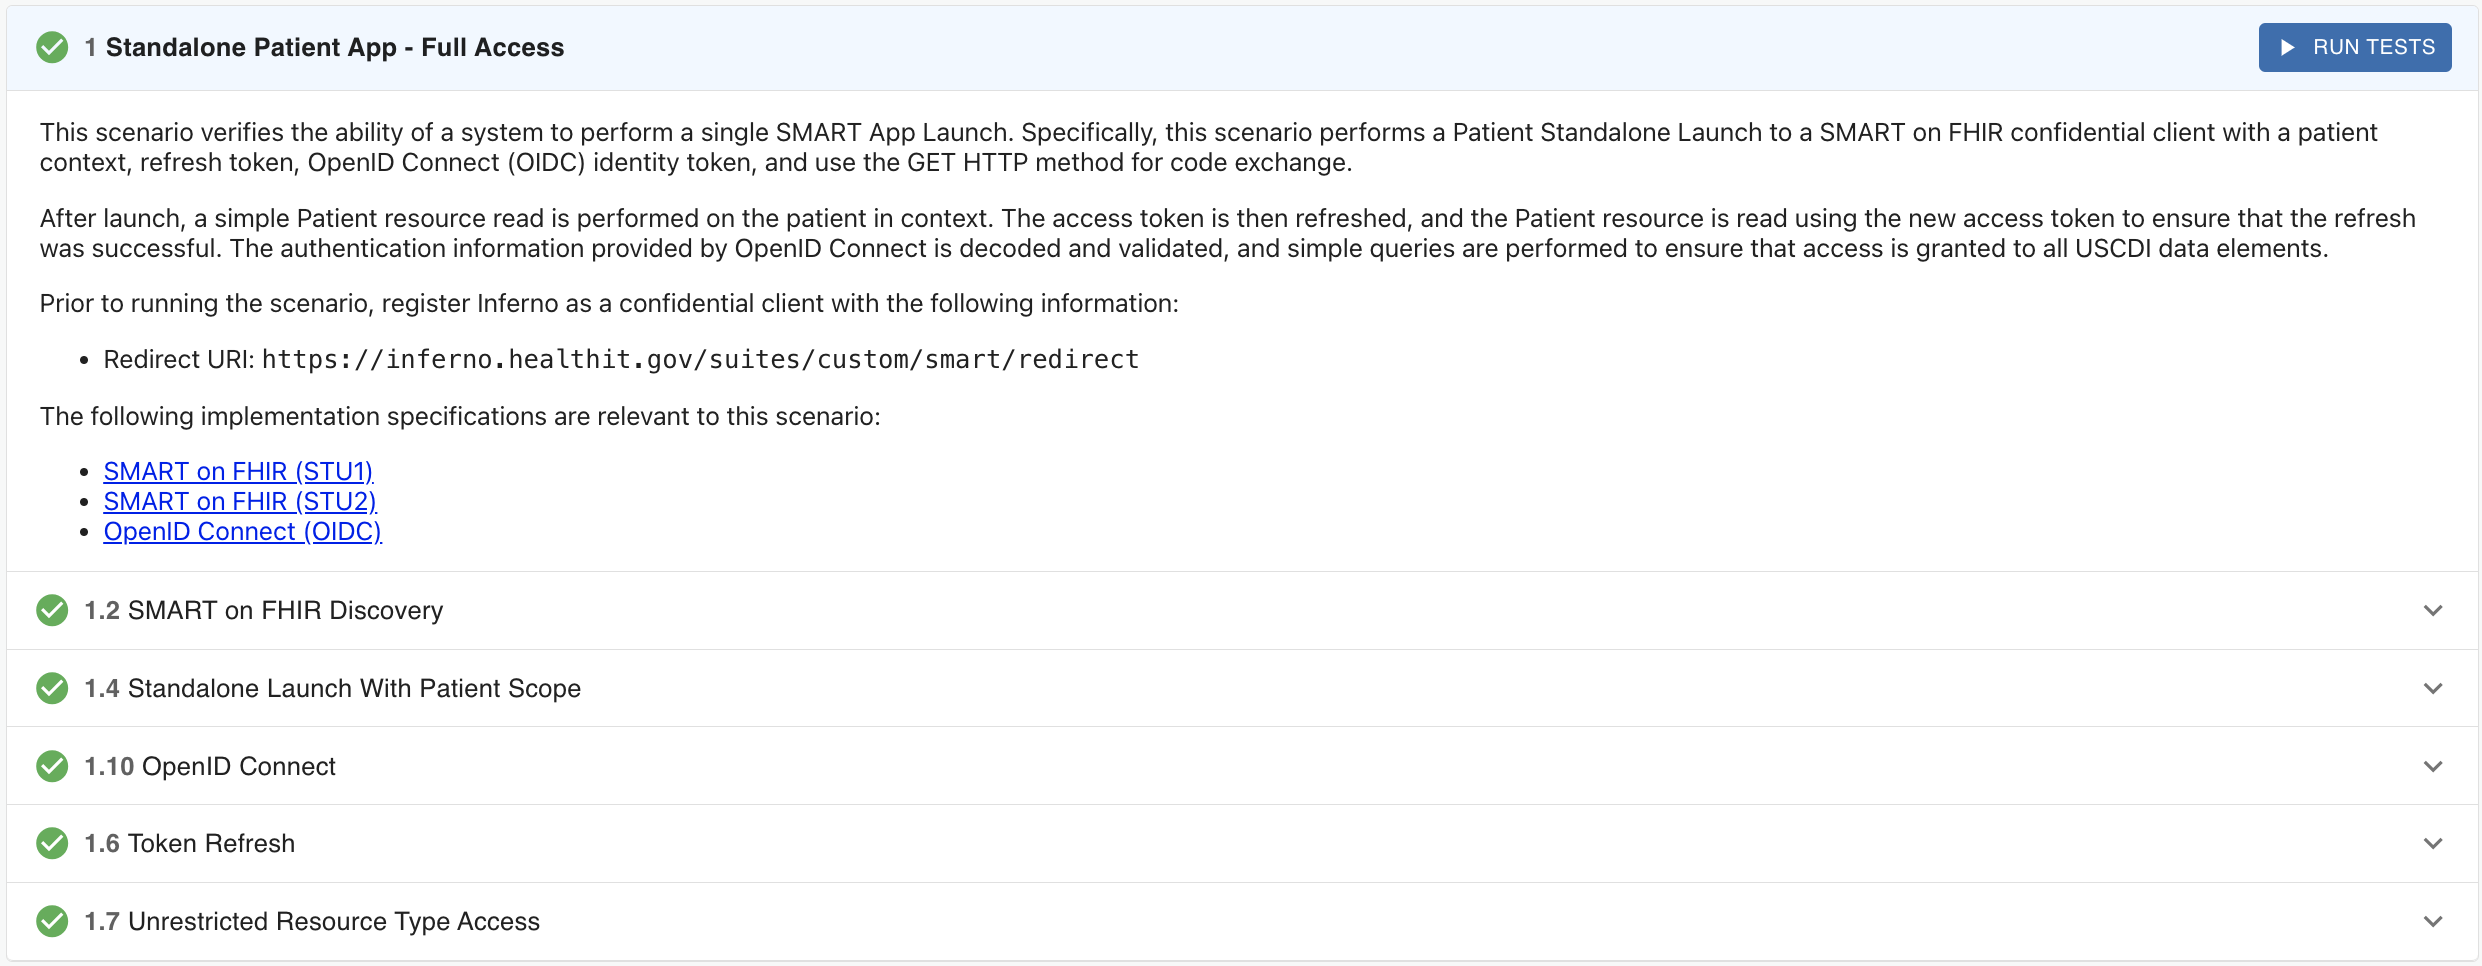
- Inferno completes the test suite
- Expand individual tests for details
Notes
- Ensure your
baseUrlis HTTPS if TLS is enabled - Scopes in consent must match what your client requests
- If authorization fails, verify Client Registration settings and redirect URI
Related
- Client Registration: docs/Smart/Client-Registration.mdx
- SMART Overview: docs/Smart/Intro.mdx