Overview
In this section, we will learn about Smart Client registration.
info
We will use Inferno (next page) as our SMART Client
Register New App
Step 1
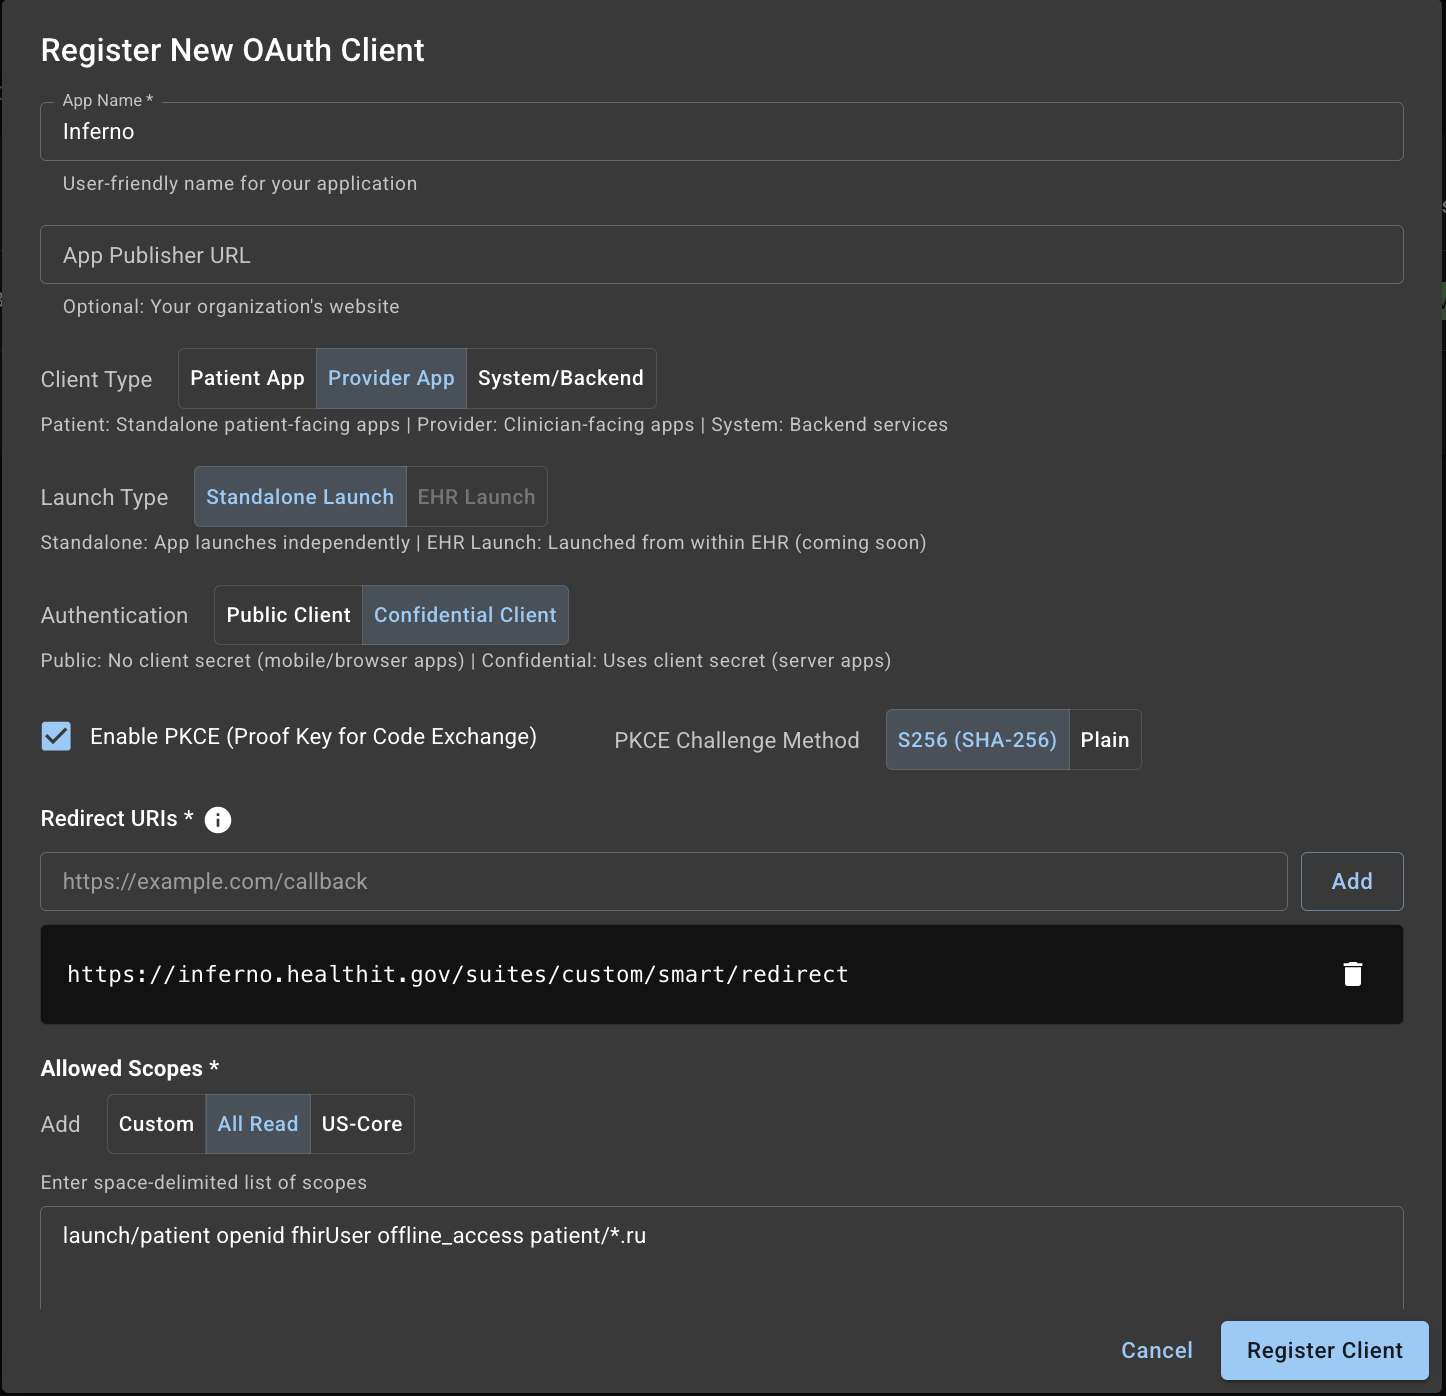
In the form:
- App Name: User-friendly name for your application
- App Publisher URL: Optional; your organization’s website
- Client Type (radio): Patient | Provider | System
- For Inferno, choose Provider
- Launch Type (radio): Standalone | EHR Launch
- For Inferno, choose Standalone
- Authentication (radio): Public | Confidential
- For Inferno, choose Confidential
PKCE:
- Keep PKCE enabled (recommended)
- Challenge Method:
SHA-256(default)
Redirect URIs:
- Obtain from the client app
- Inferno uses:
https://inferno.healthit.gov/suites/custom/smart/redirect - Click Add to save the URI
Allowed Scopes:
- Required baseline:
launch/patient,openid,fhirUser,offline_access - Add from one of: Custom | All Read | US Core
- Custom: enter space-delimited scopes
- All Read:
patient/*.rs - US Core: common patient-read scopes across US Core resources
You can edit scopes in the text box before registering.
Click “Register Client”.
Step 2

This dialog shows the Client ID and Secret. Copy these; they are displayed only once.
List Clients
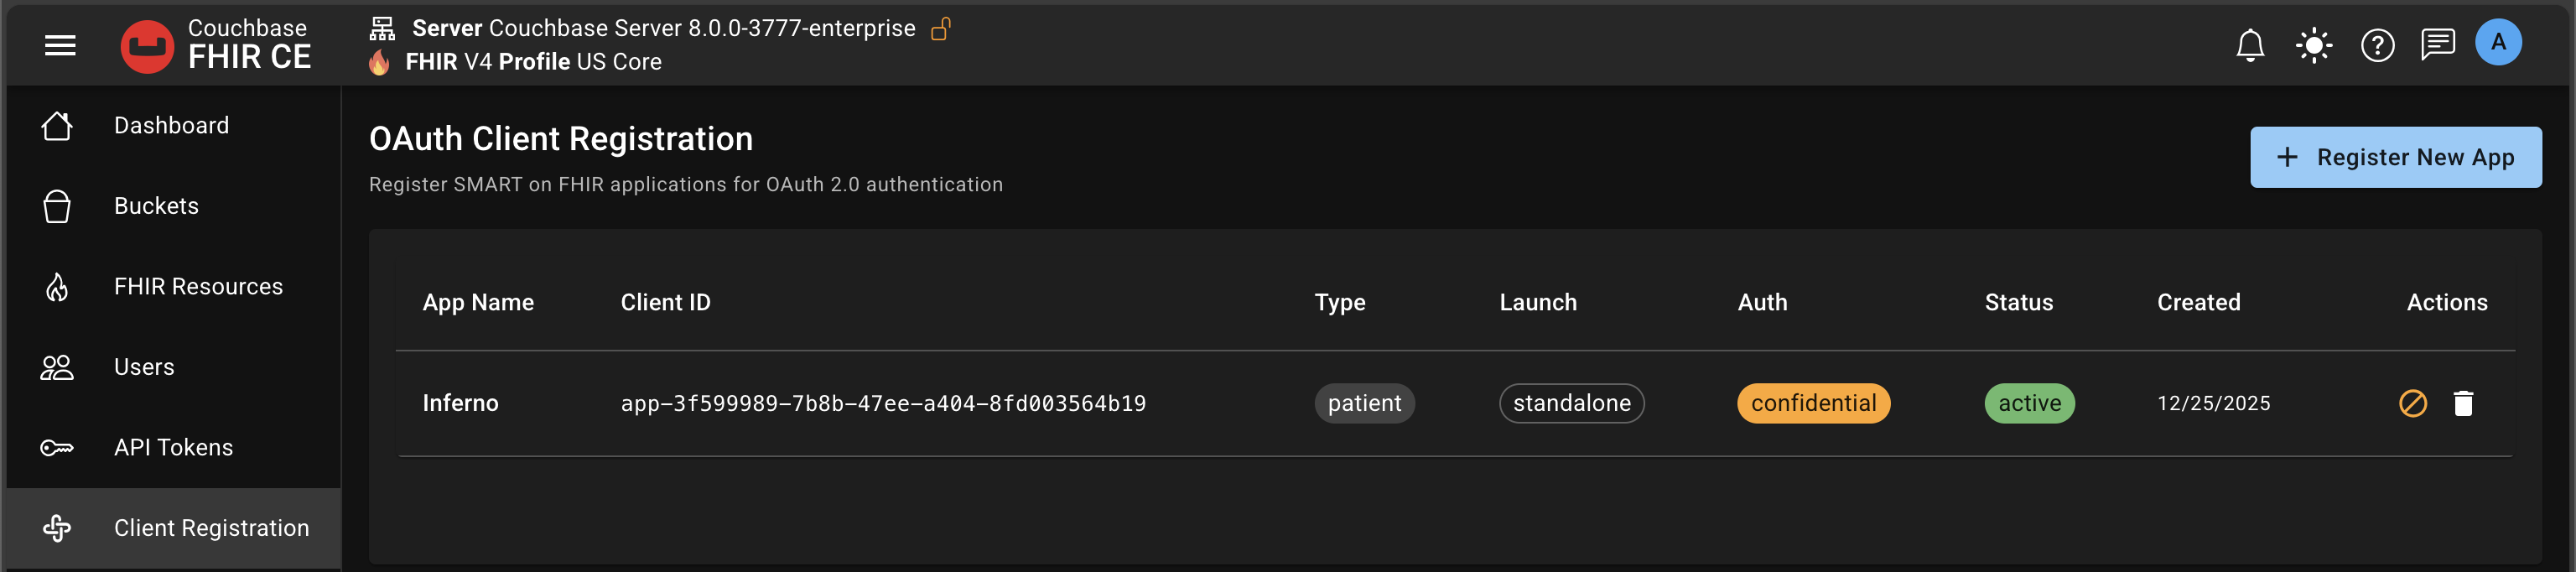
- Shows all your registered client
- Admins can see and manage all
- Developers can see and manage their own
- You can revoke or delete client
- You can have as many clients as you want
Client Details
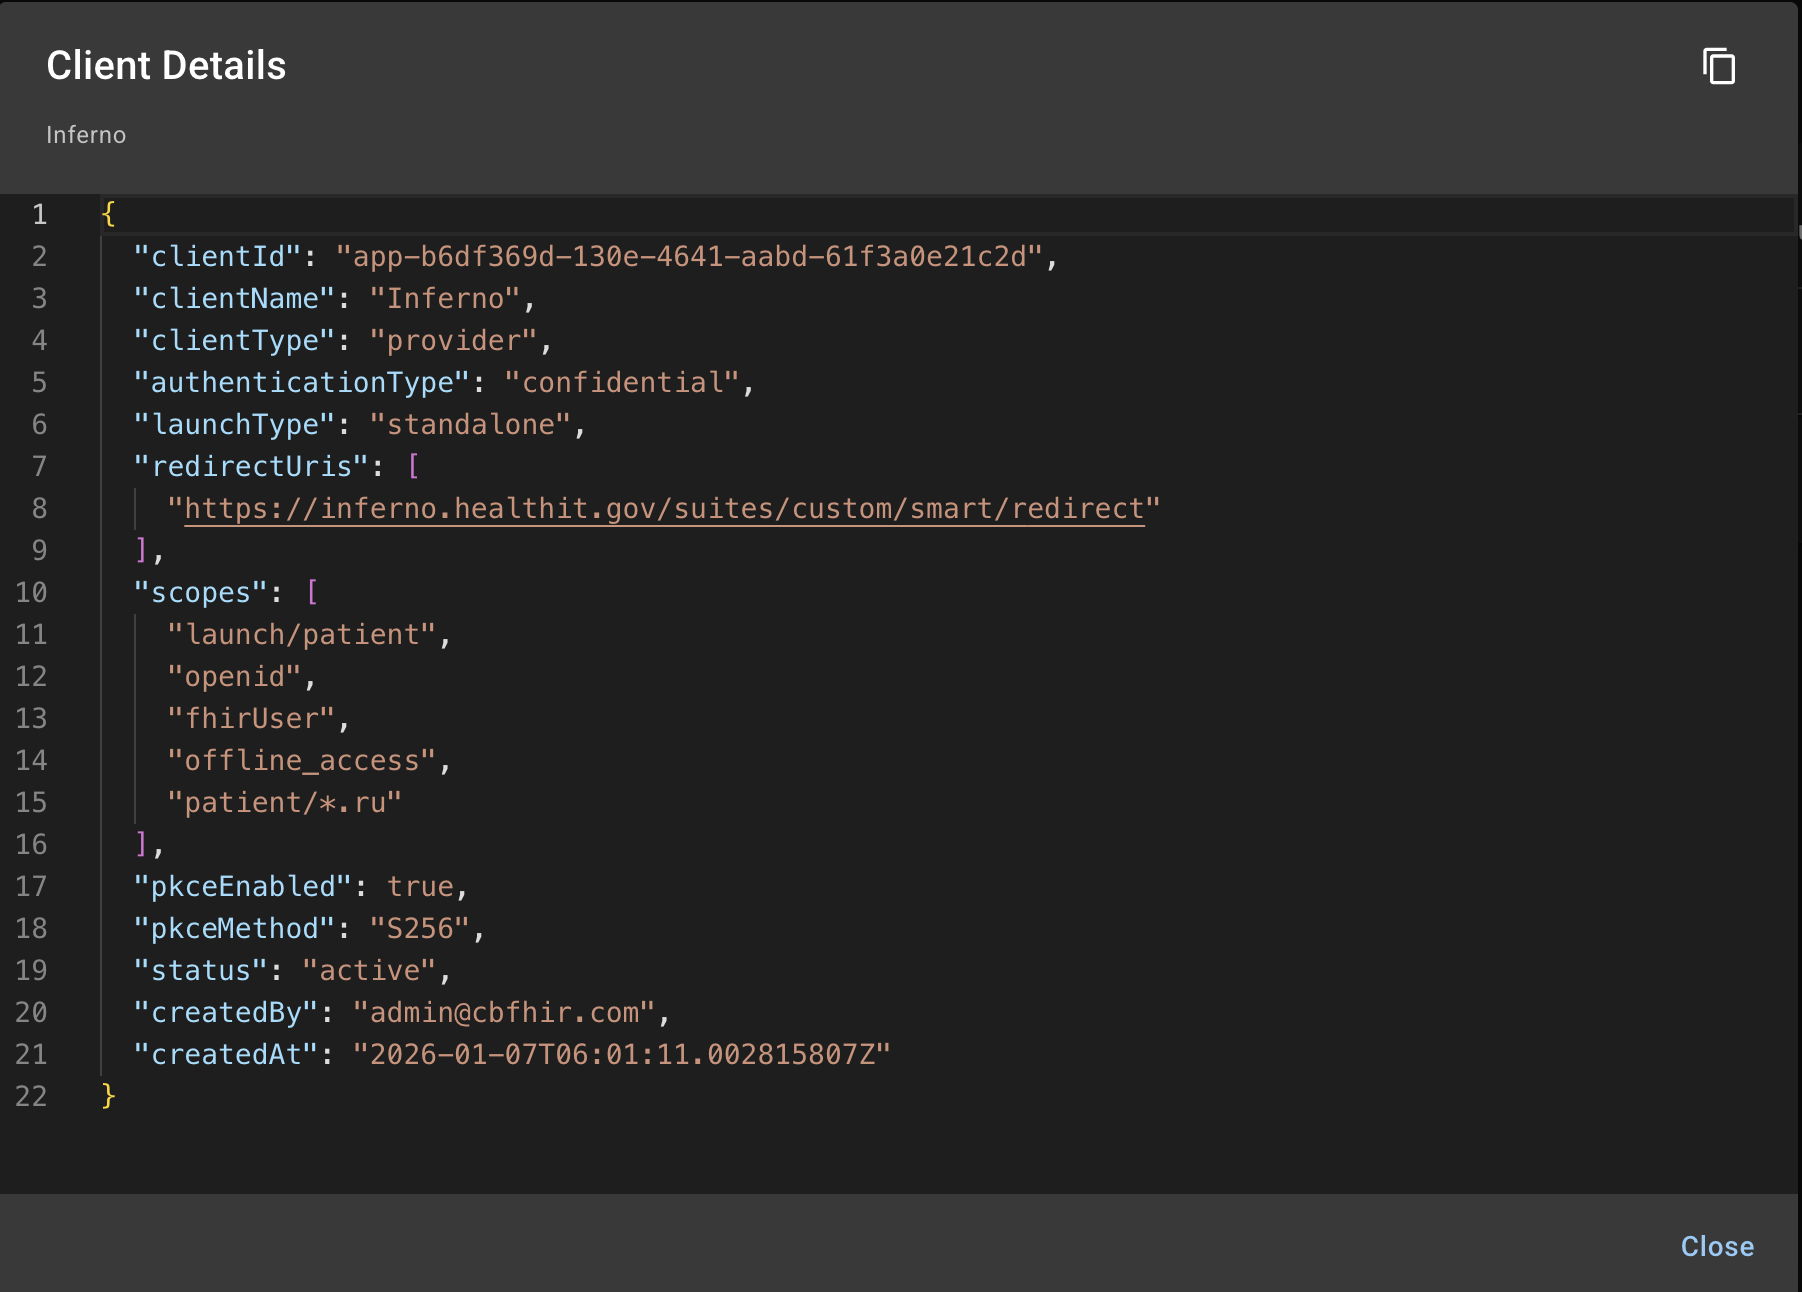
Clicking on any row birngs up a bix showing the details of the registered client.