Couchbase Capella Setup
Couchbase Capella is the fully-managed Database-as-a-Service (DBaaS) offering from Couchbase. It provides enterprise-grade Couchbase clusters in the cloud without the operational overhead.
Capella offers two deployment options for FHIR CE. Choose based on your needs:
- Single Node
- Custom Configuration (Recommended)
Single Node Capella Setup
Perfect for development, testing, and small production workloads.
Step 1: Create New Capella Cluster
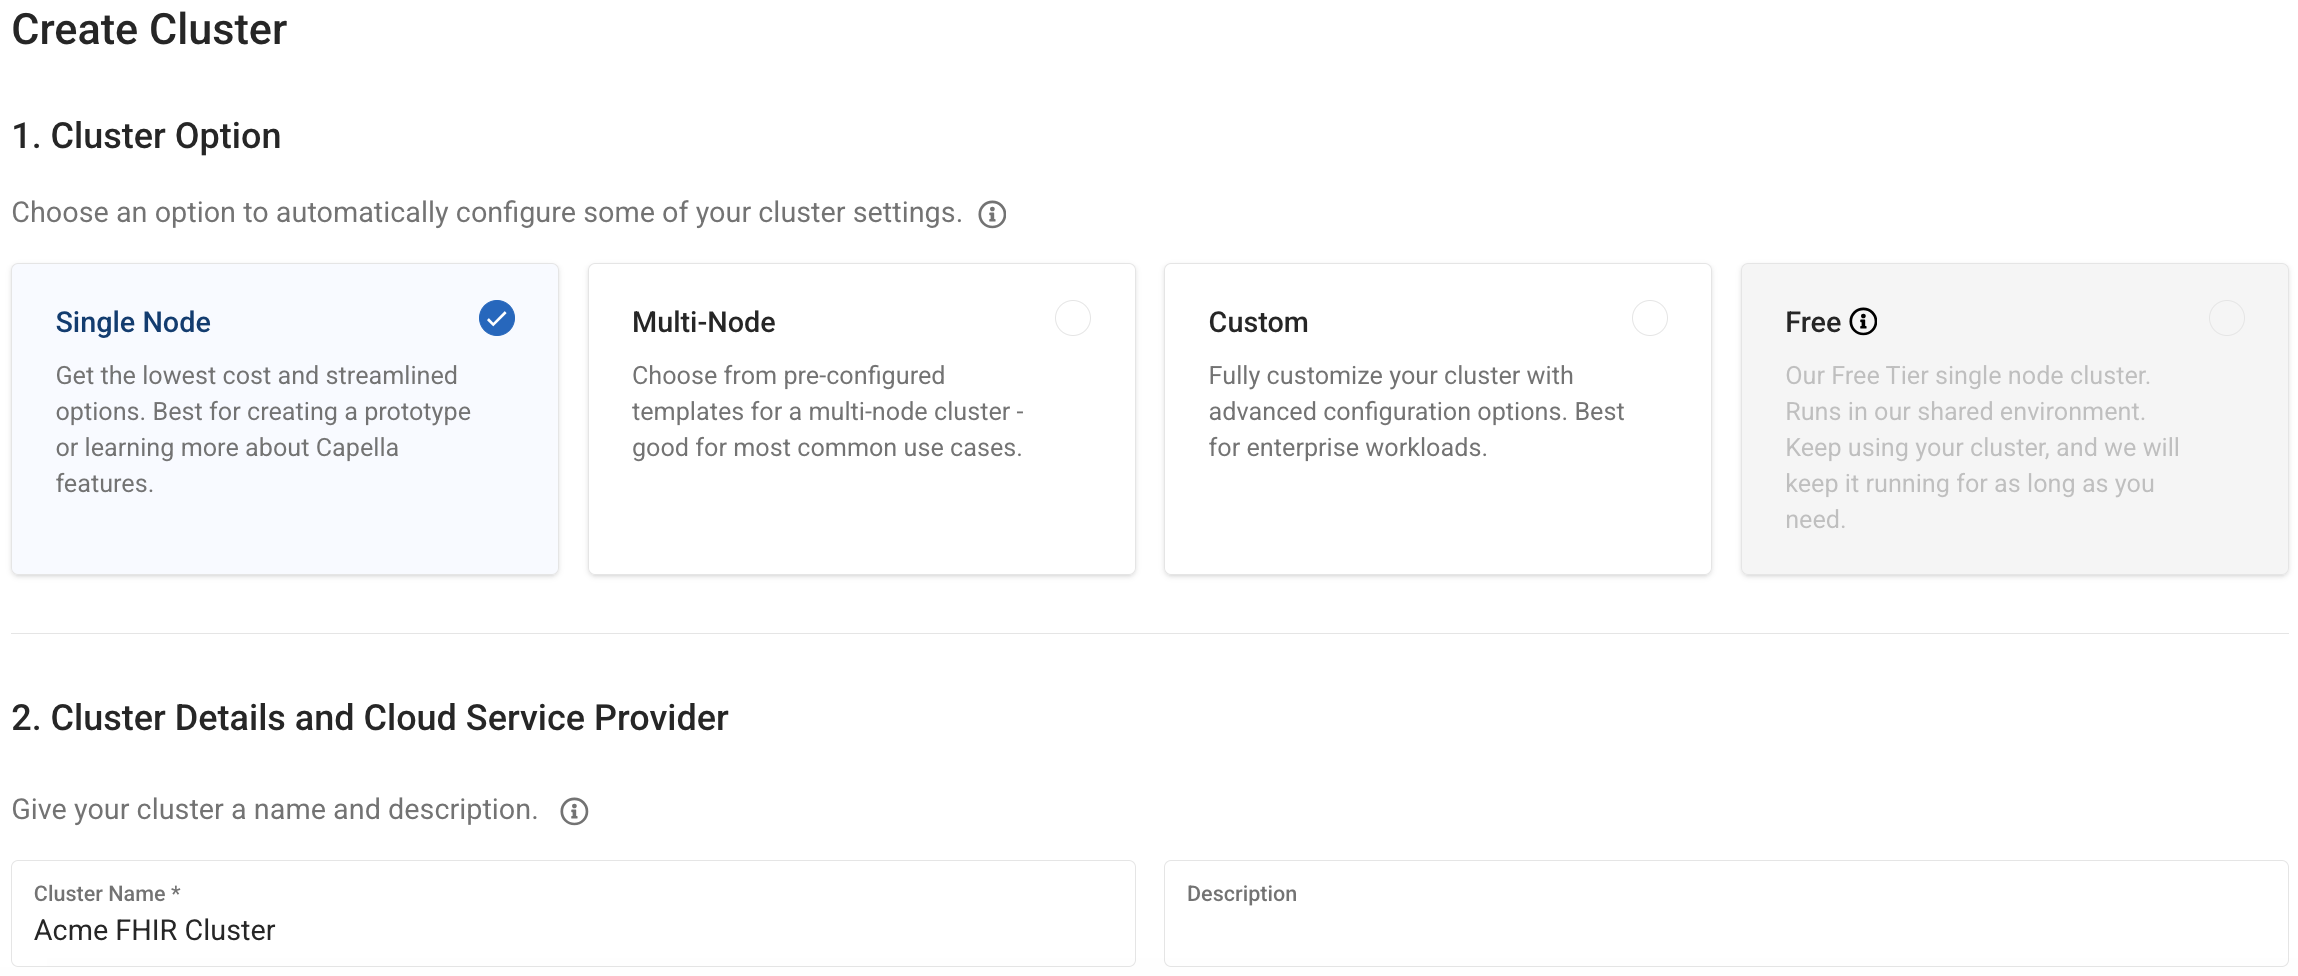
You can name the cluster anything meaningful (e.g., "fhir-dev-cluster", "hospital-cluster")
Step 2: Configure Services
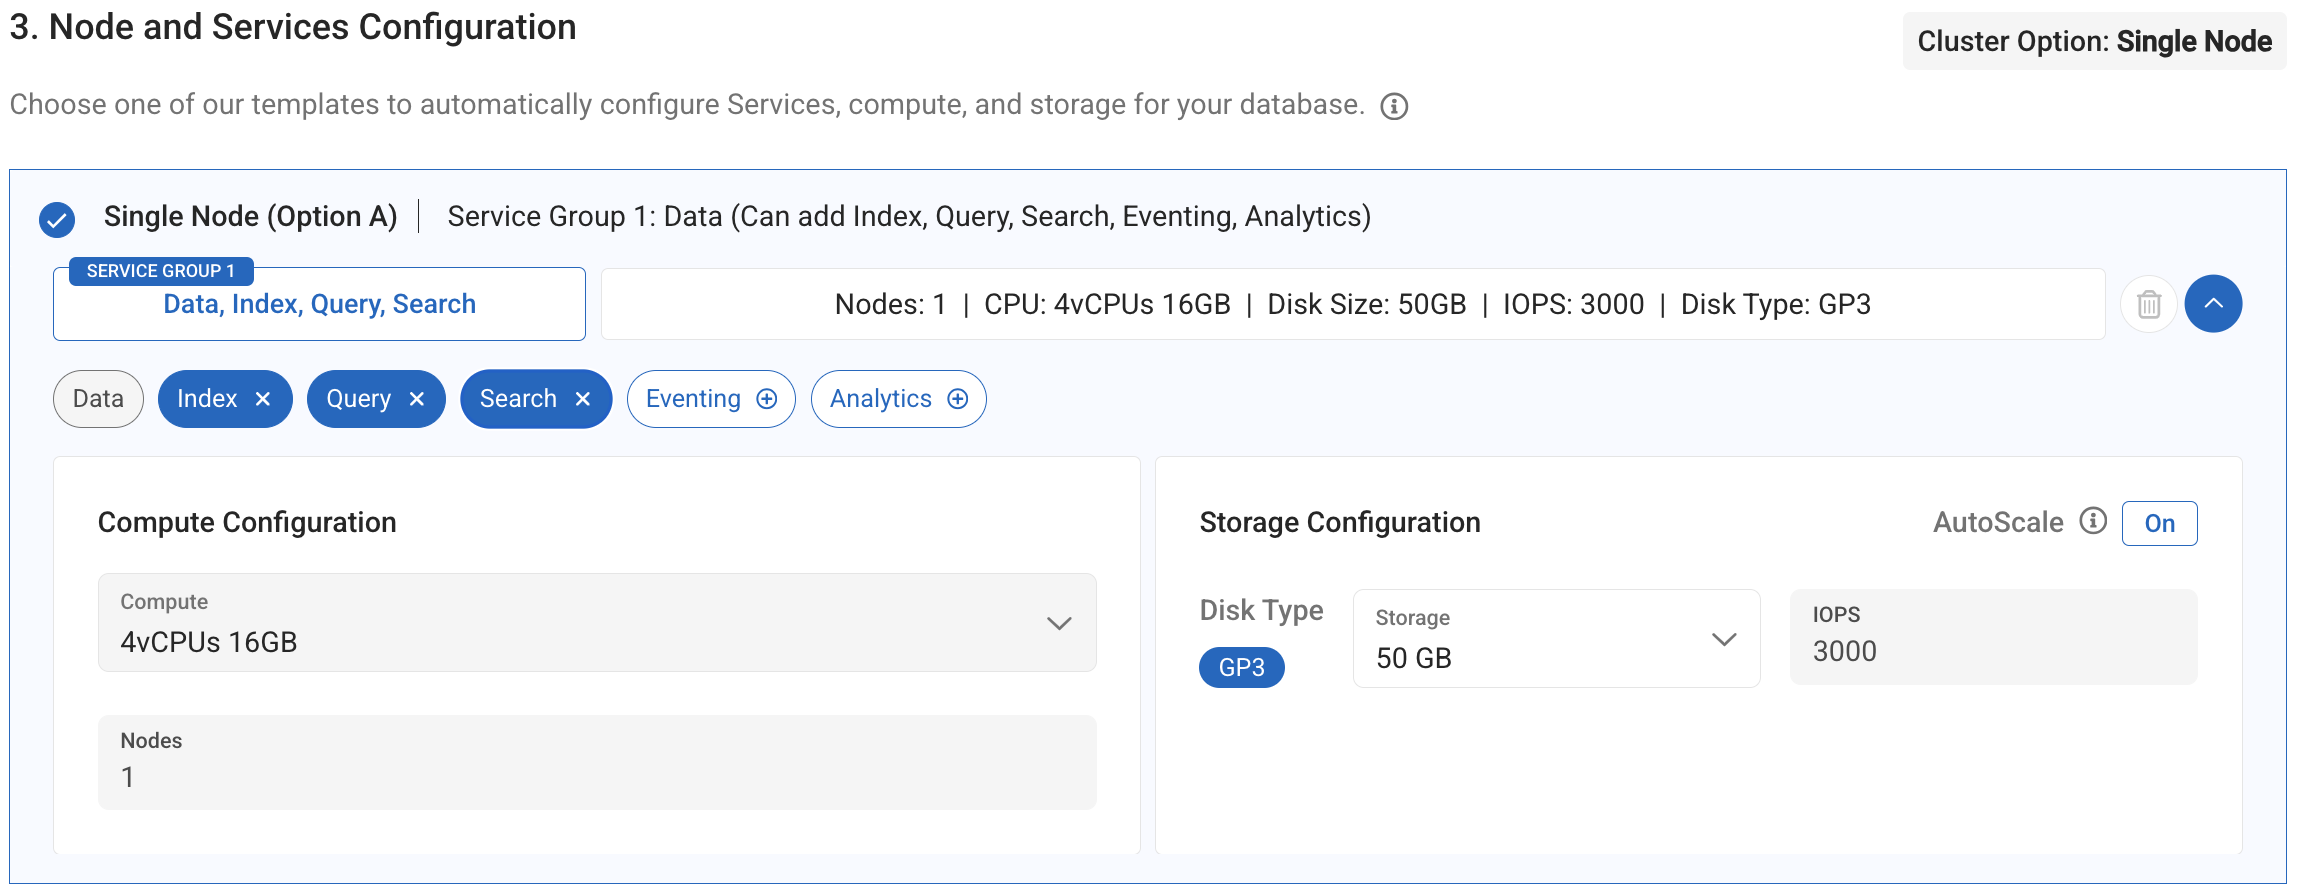
Service Configuration:
- Adjust Compute - Select appropriate instance size for your workload
- Add Search Service - Required for FHIR full-text search capabilities
Your cluster should now have 4 essential services:
- Data - Document storage
- Query - N1QL query processing
- Index - Primary indexes
- Search - Full-text search (FTS)
Custom Capella Setup
For advanced users who need specific configurations.
Step 1: Choose Custom Deployment
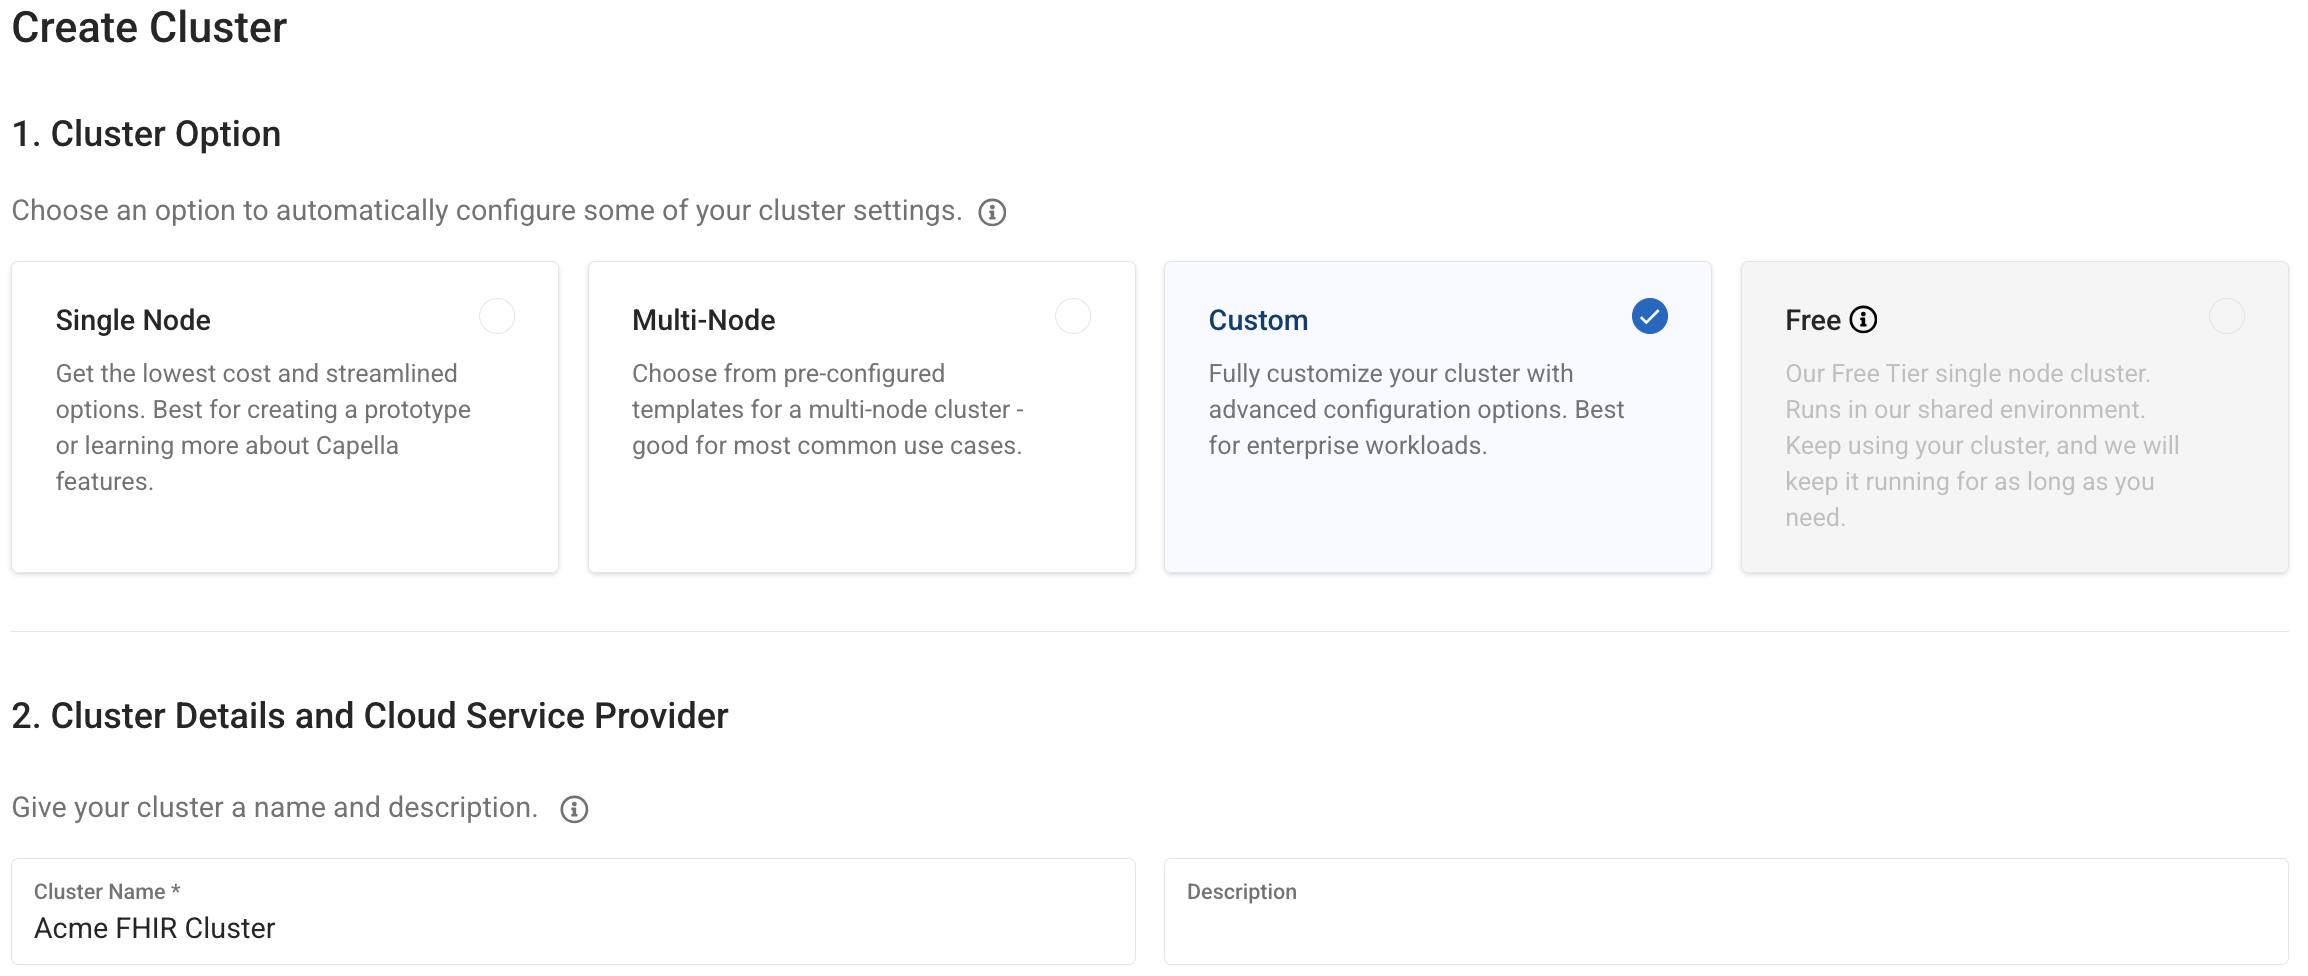
- Choose Custom deployment option
- Name your cluster appropriately
- This gives you full control over node configuration
Step 2: Configure Single Node
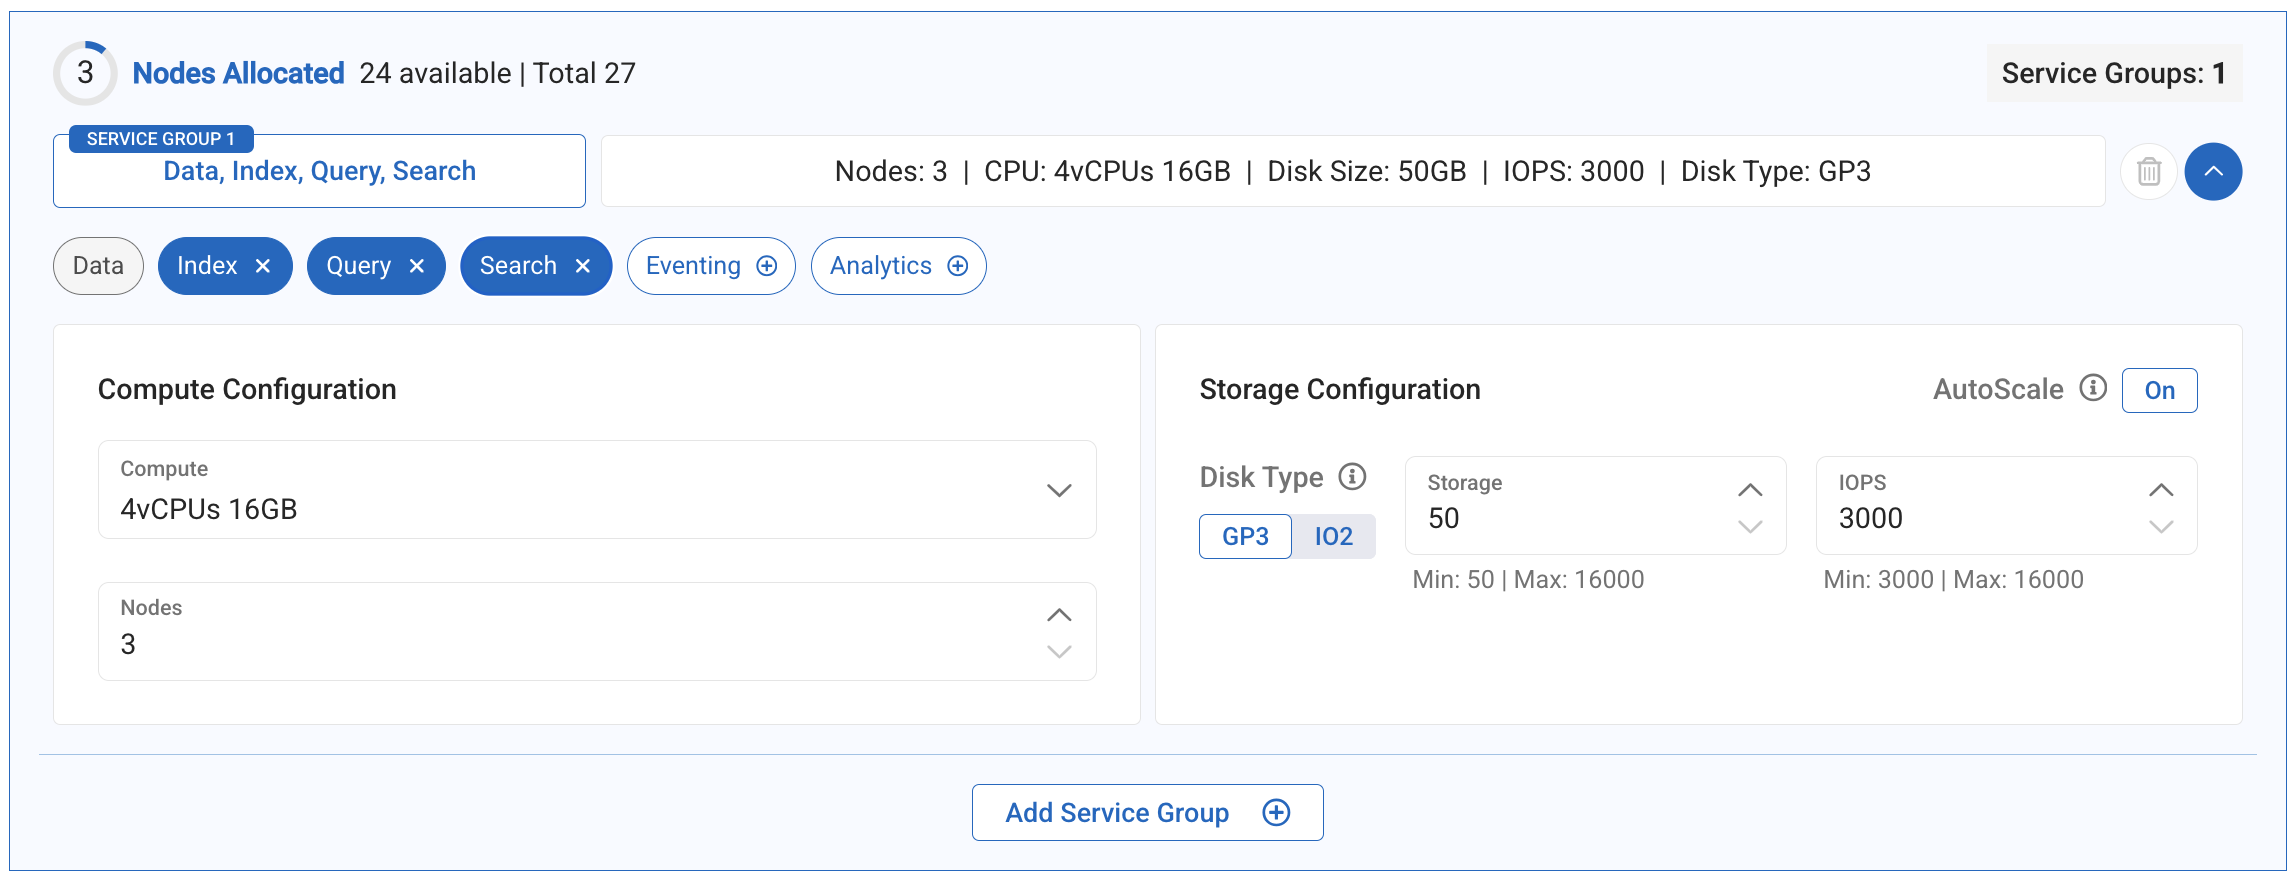
Custom Configuration Steps:
- Delete extra nodes - Keep only 1 node for single-node setup
- Adjust Compute - Select instance type based on workload
- Add Search Service - Essential for FHIR functionality
Make sure to delete all nodes except 1 to create a true single-node deployment suitable for FHIR CE.
Network Security Configuration
Add Allowed IP Addresses
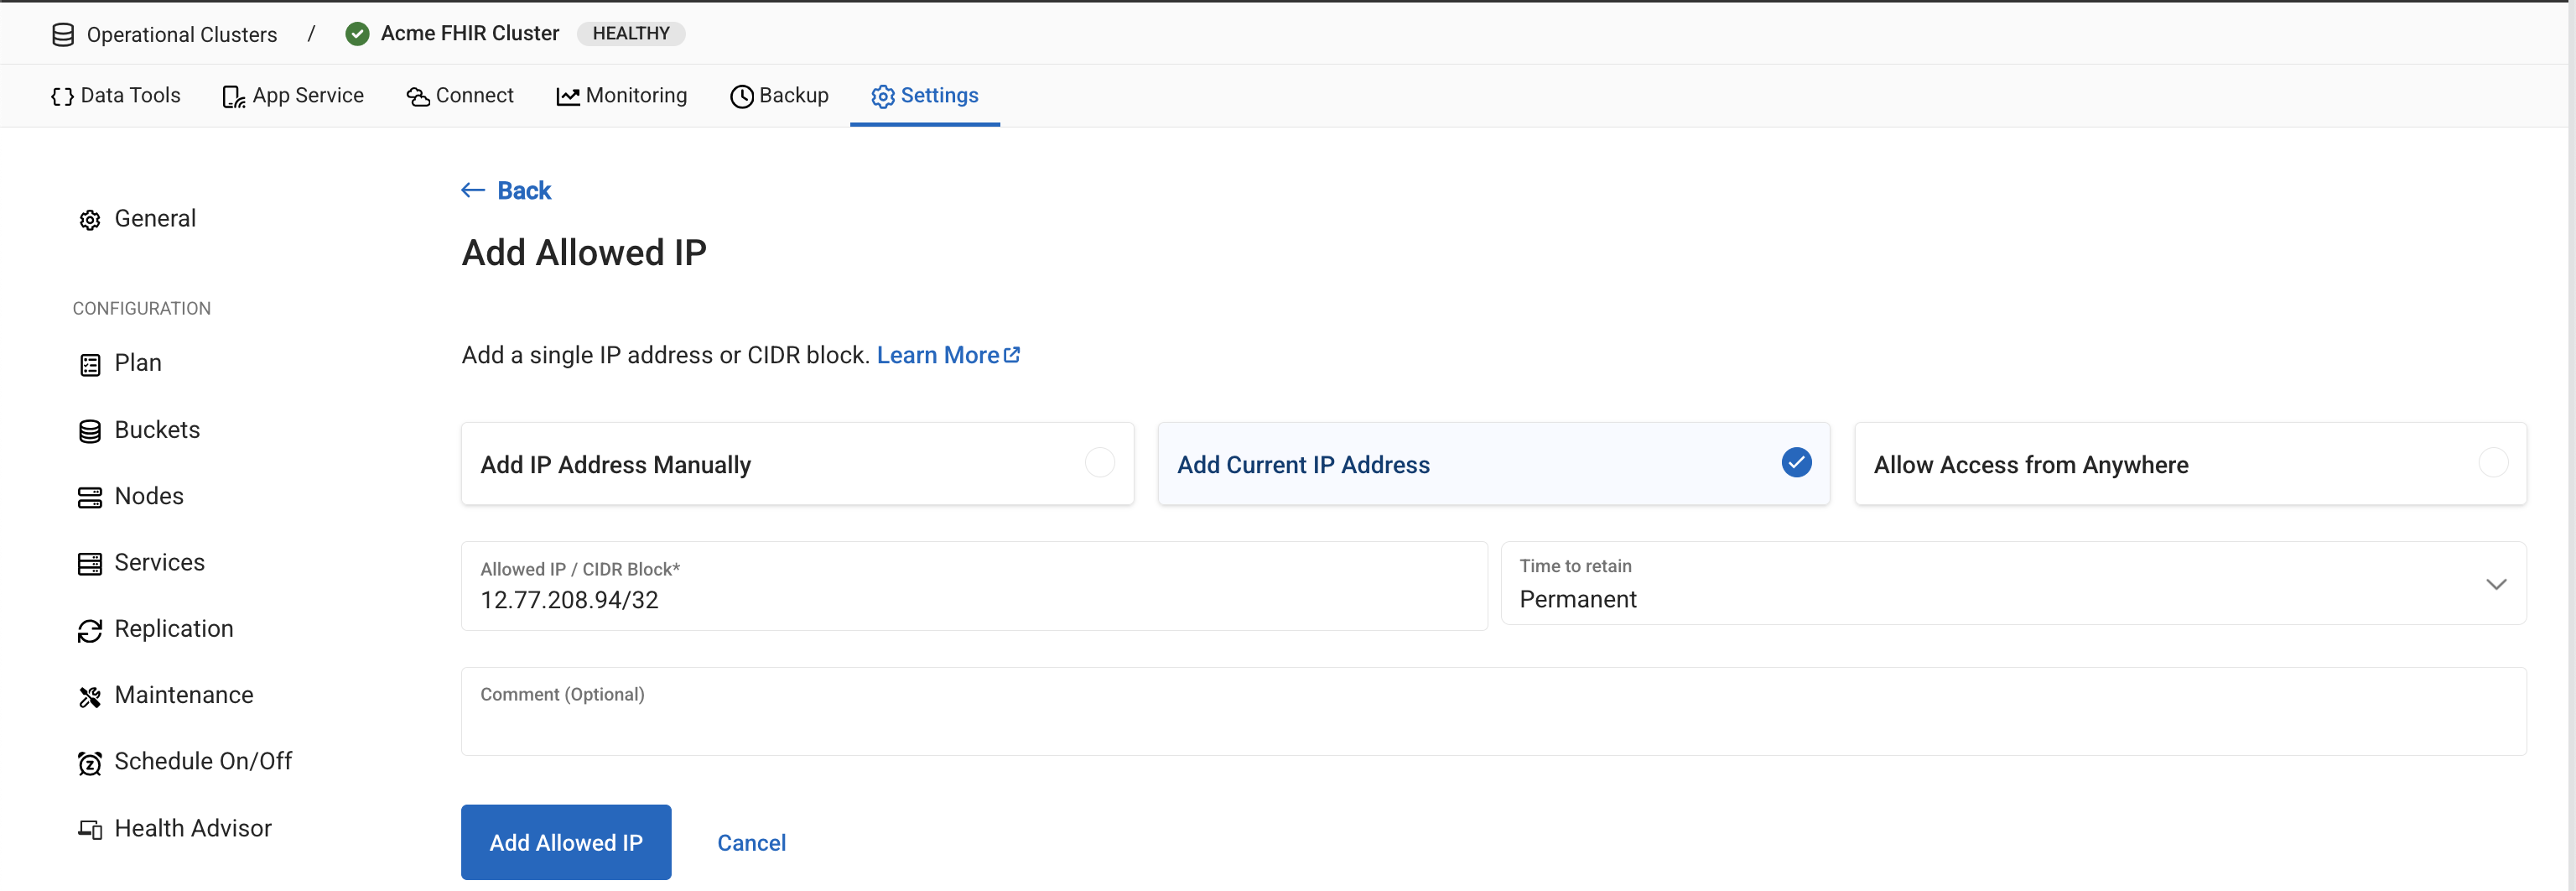
Configure network access for your FHIR server:
This setting controls client access to your Capella cluster. You have two options:
- Specific IP (Recommended)
- Allow From Anywhere
Add FHIR Server IP:
- Add the specific IP address of your FHIR server
- More secure approach for production environments
- Requires knowing the exact IP where FHIR CE will run
Allow access from anywhere:
- Use
0.0.0.0/0for development/testing - Not recommended for production due to security implications
- Convenient for dynamic IP environments
Database Access Configuration
Create Cluster Access Credentials
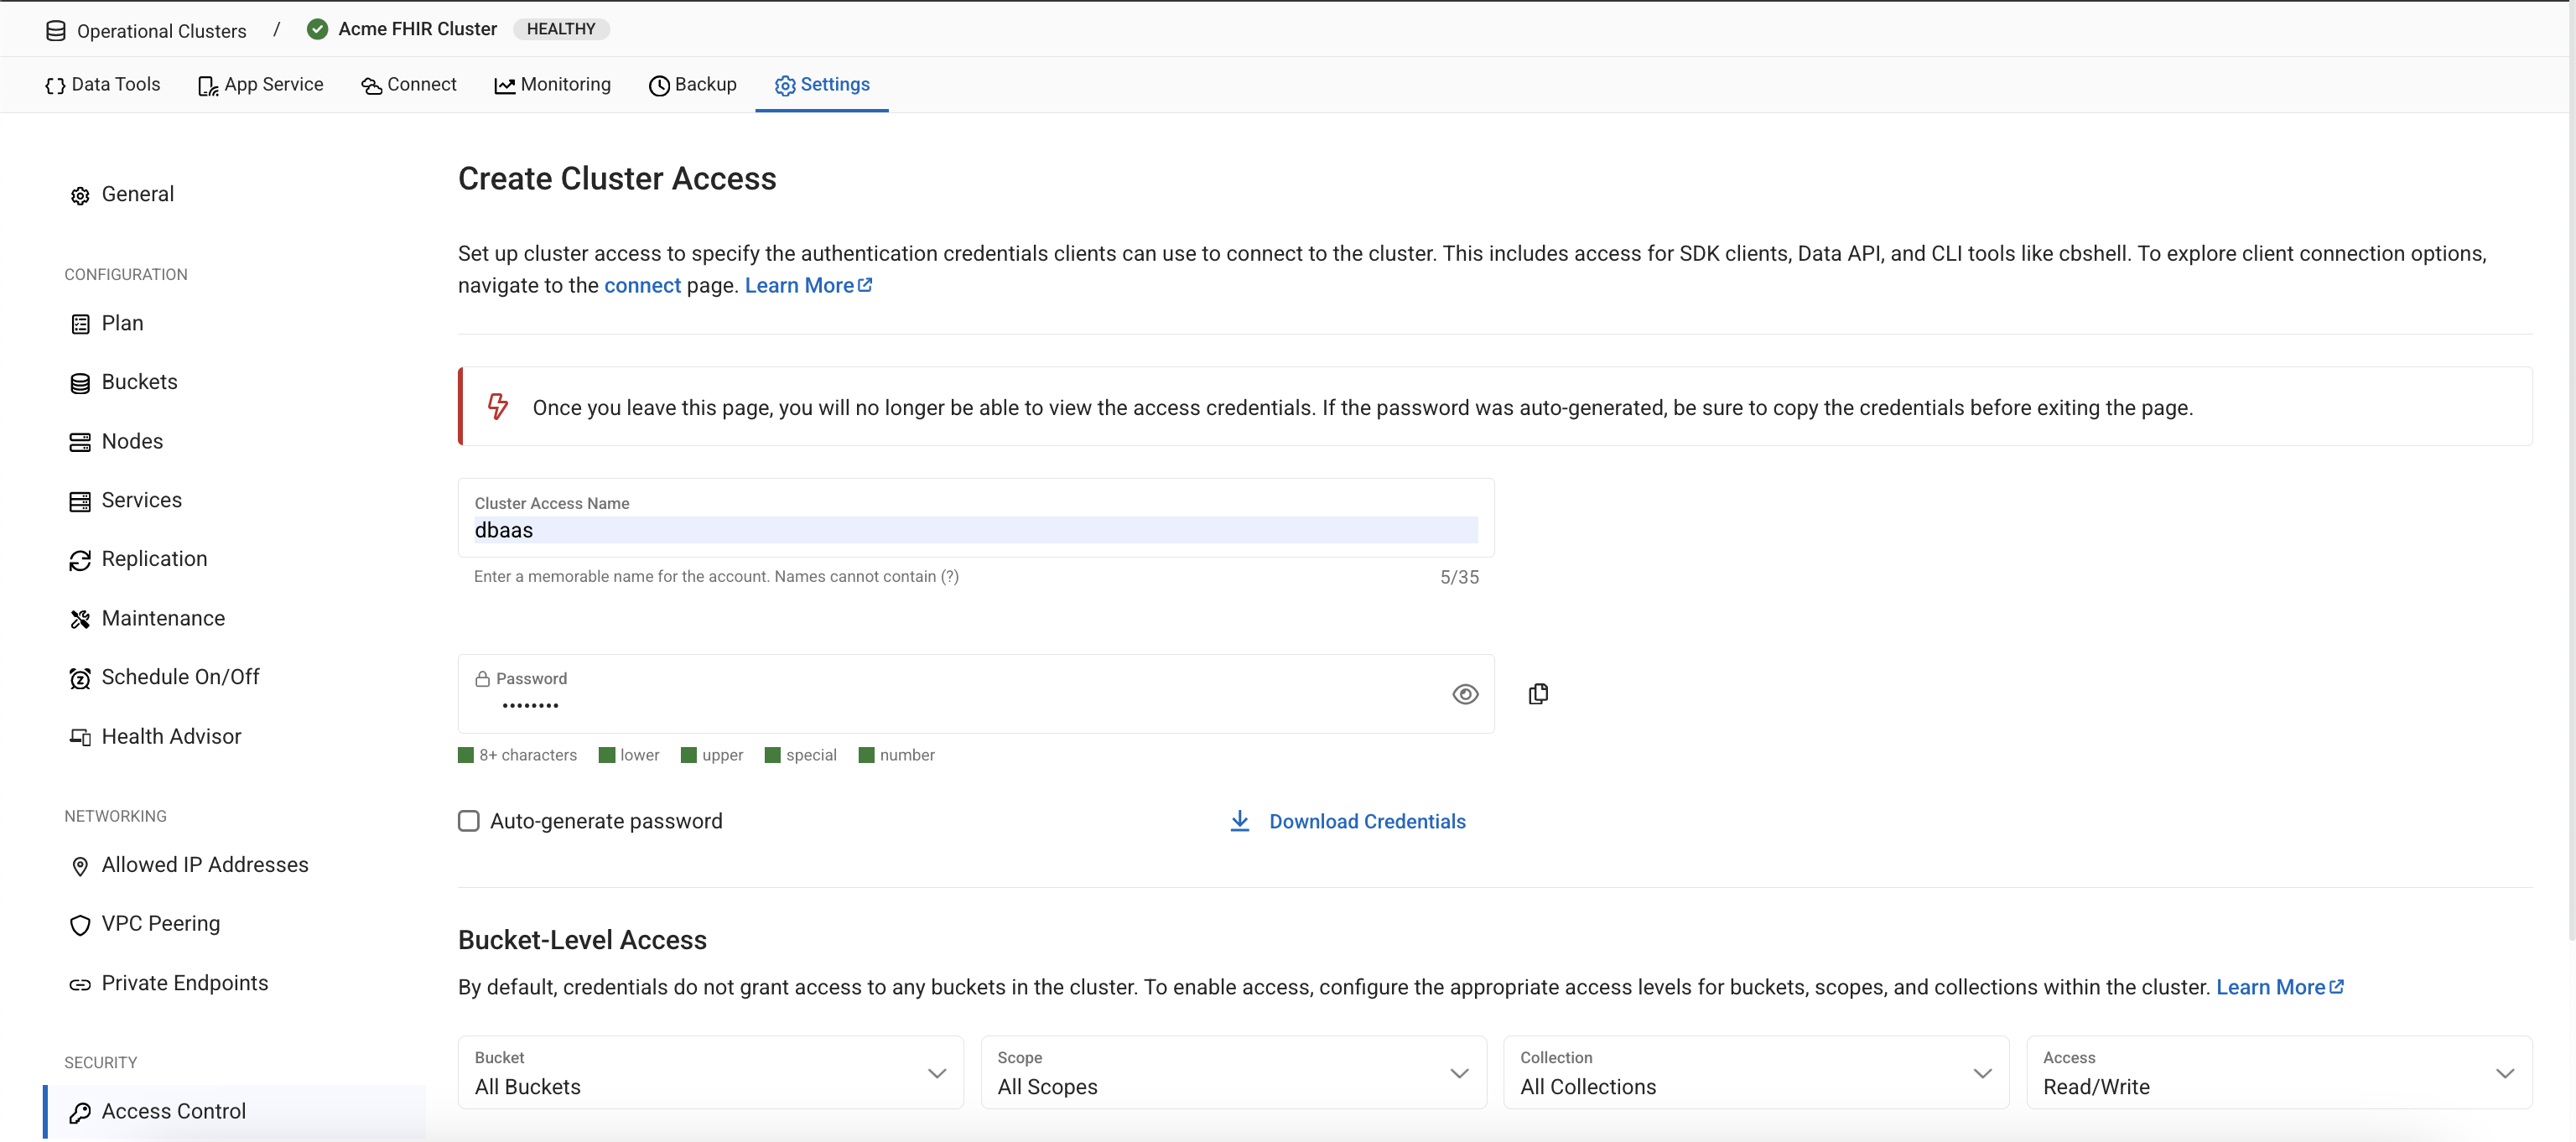
Create database credentials for FHIR CE to access your Capella cluster:
Note down the username and password - you will need these in your FHIR CE config.yaml file!
Access Configuration:
- Username: Create a meaningful username (e.g., "fhir-service")
- Password: Generate a strong password
- Bucket Access: Choose All Buckets
- Scope Access: Choose All Scopes
- Collection Access: Choose All Collections
- Permissions: Grant Read/Write access
FHIR CE requires full read/write access to all buckets, scopes, and collections to properly manage FHIR resources and multi-tenancy.
FHIR Tenant Configuration
Create the FHIR Bucket
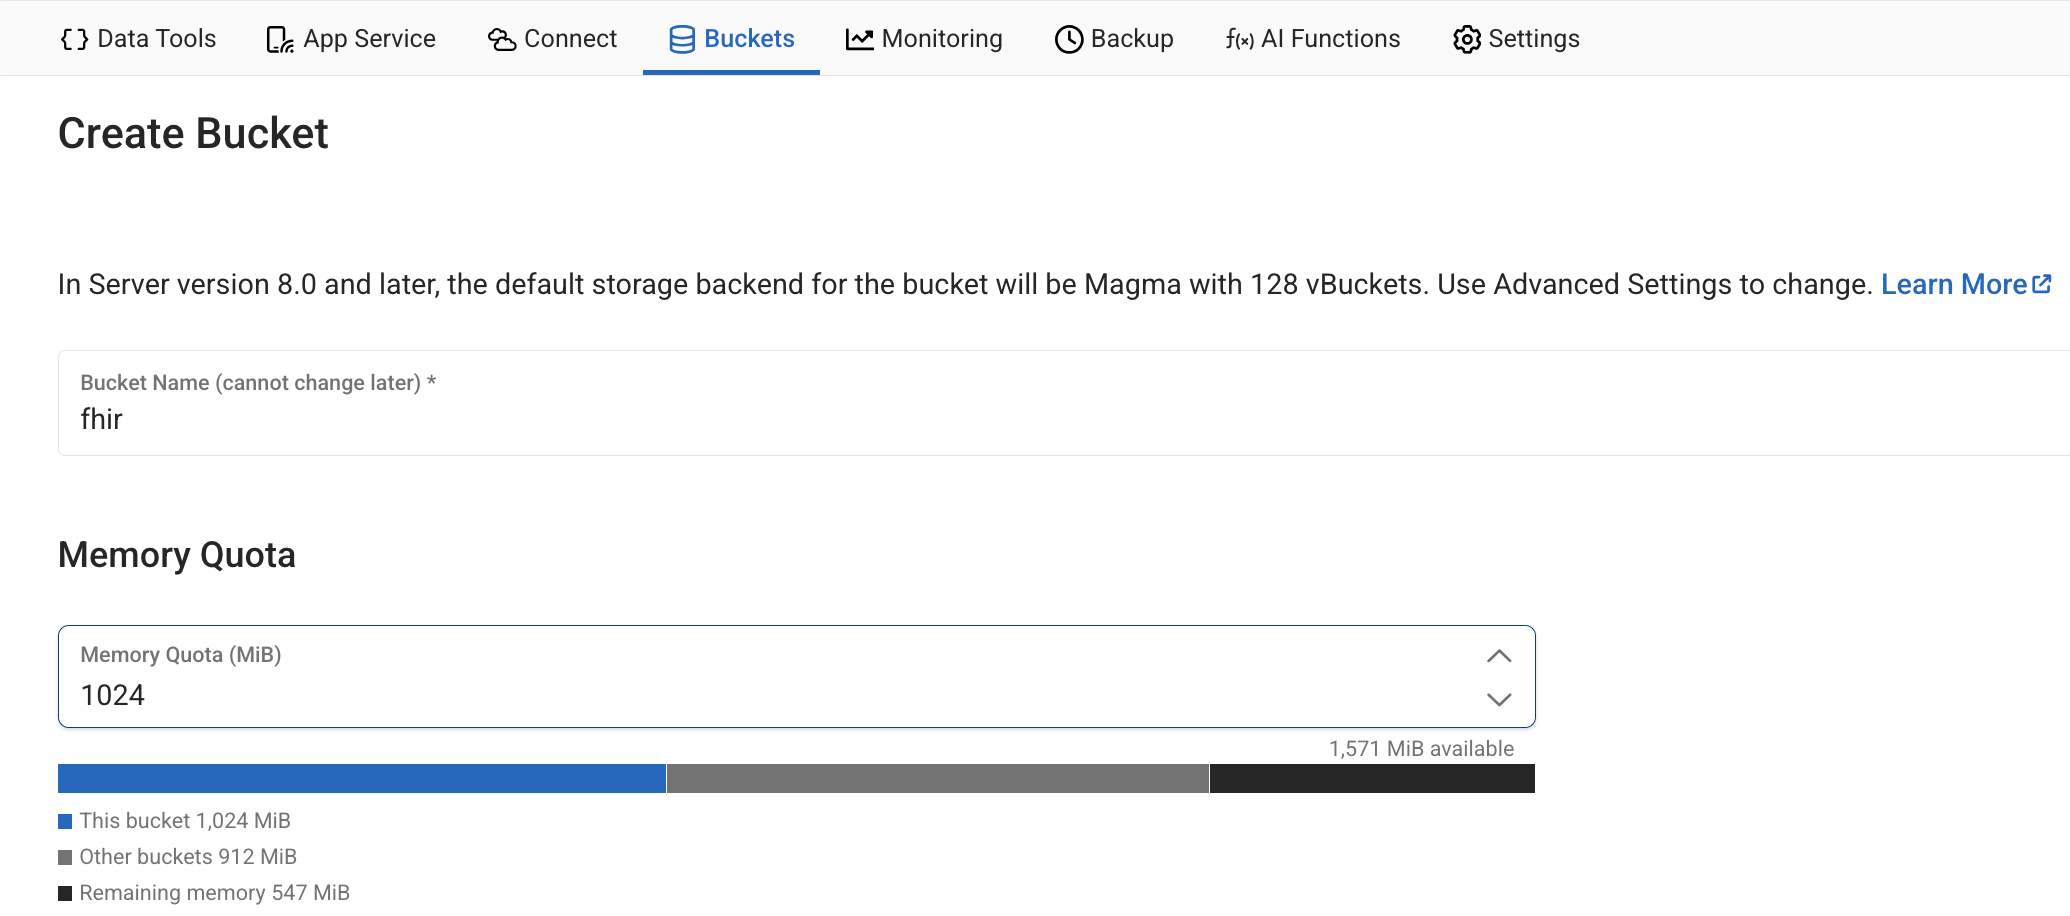
Configure your FHIR bucket:
Bucket Configuration Guidelines:
- Bucket Name: fhir this is fixed
- Memory Quota: Allocate based on your expected data volume
- Bucket Type: Keep as Couchbase (default)
- Replicas: Capella handles replication automatically
- Compression: Enabled by default for better storage efficiency
- 🧪 Development Setup
- Production Setup
Recommended Configuration:
Bucket Name: fhir
Memory Quota: 1 GB
Durability: Majority
Compression: Enabled
Perfect for development, testing, and proof-of-concept deployments.
Recommended Configuration:
Bucket Name: fhir
Memory Quota: 4 GB or higher
Durability: Majority
Compression: Enabled
Suitable for production healthcare environments with high availability requirements.
Connection Information
When configuring FHIR CE, use your EC2 instance's connection details (example):
connection:
  connectionString: "couchbases://cb.xxx-xxx.cloud.couchbase.com"
  username: "dbaas"
  password: "password"
  serverType: "Capella"
  sslEnabled: true
Congratulations! Your Capella cluster is ready. Now you can install and configure FHIR CE to connect to this managed Couchbase instance.